首页 > 基础资料 博客日记
Java---Cloneable接口---浅克隆和深克隆
2024-06-23 11:00:05基础资料围观603次
文章Java---Cloneable接口---浅克隆和深克隆分享给大家,欢迎收藏Java资料网,专注分享技术知识
在Java中,我们如何实现一个对象的克隆呢?
在Java中实现对象的克隆,我们要用到Cloneable接口。克隆也分为浅克隆和深克隆。
1.实现浅克隆
1.重写clone方法

当我们想直接通过前面已经建立好的对象来调用Object类中的clone方法时,发现不行。因为Object类中的clone方法是被protected修饰的,只能在子类的内部调用。如下图

所以我们要在Student类中重写Object类中的clone方法。
在Student类中重写了clone方法如下图所示

重写之后,我们发现就能调用clone方法了。

调用之后还会报错。

原因如下图


我们发现clone方法的返回值类型为Object类型,所以我们要进行强制类型转换。
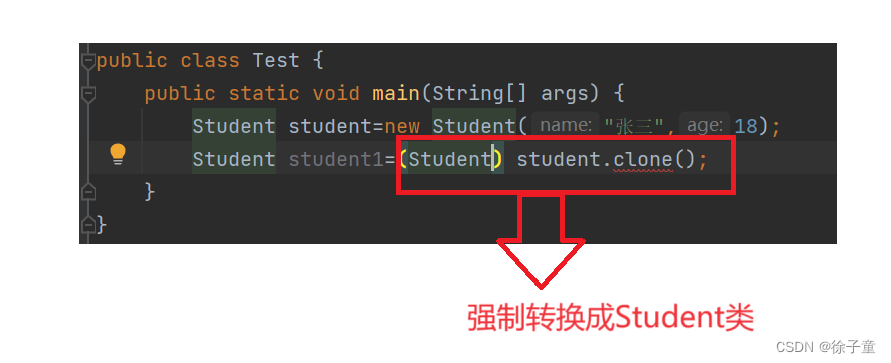
我们发现还会报出以下错

解决方法
在main函数后加下图红色方框里面的字段。

到这一步浅克隆就完成了。
1.完整代码
class Student implements Cloneable{
    public String name;
    public int age;
    public Student(String name,int age){
        this.name=name;
        this.age=age;
    }

    @Override
    public String toString() {
        return "Person{" +
                "name='" + name + '\'' +
                ", age=" + age +
                '}';
    }

    @Override
    protected Object clone() throws CloneNotSupportedException {
        return super.clone();
    }
}
public class Test {
    public static void main(String[] args)throws CloneNotSupportedException {
        Student student=new Student("张三",18);
        Student student1=(Student) student.clone();
        System.out.println(student);
        System.out.println(student1);
    }
}
运行代码
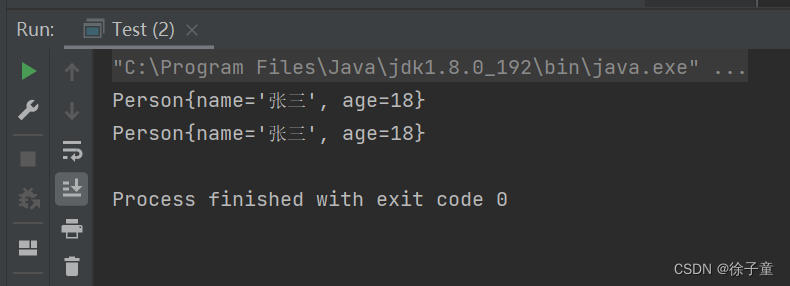
发现克隆成功了。
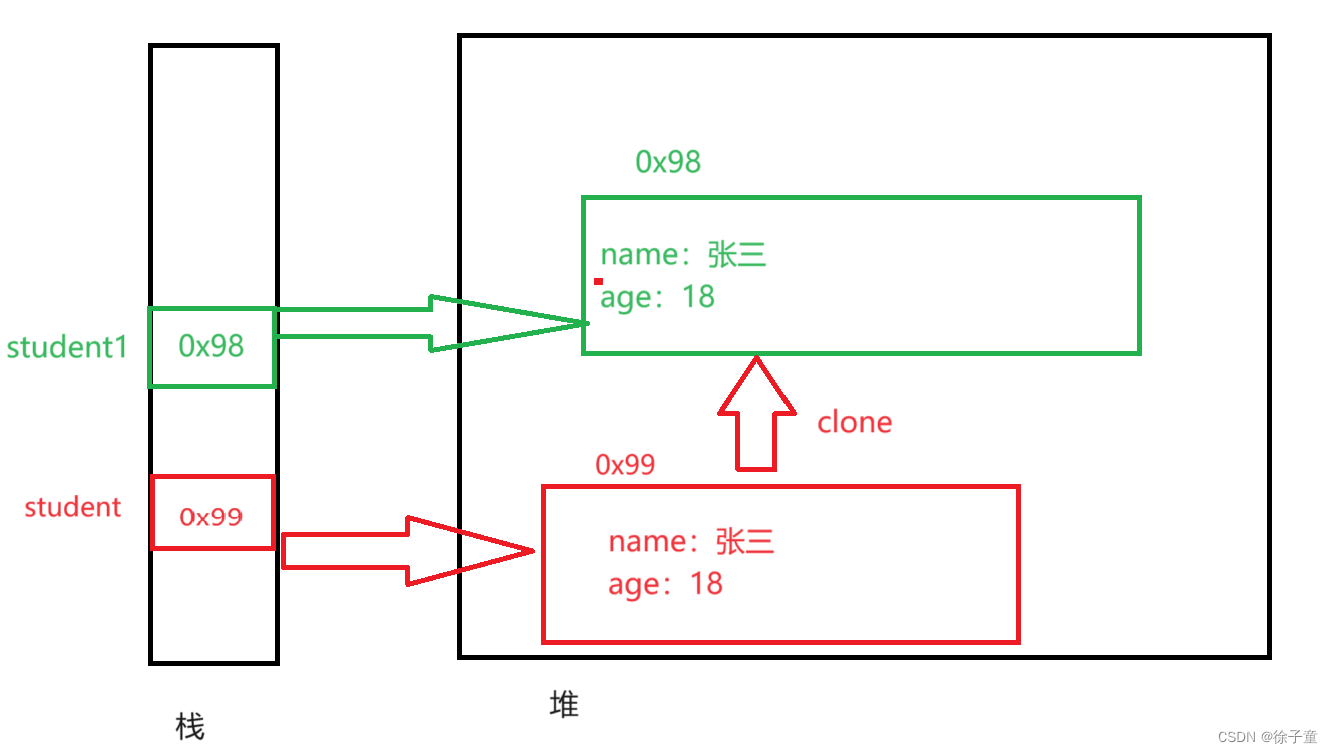
2.浅克隆堆栈图
2.实现深克隆
先来看以下代码
class Money{
    double money=24;
}
class Student implements Cloneable{
    public String name;
    public int age;
    Money m=new Money();
    public Student(String name,int age){
        this.name=name;
        this.age=age;
    }

    @Override
    public String toString() {
        return "Student{" +
                "name='" + name + '\'' +
                ", age=" + age +
                ", money=" + m.money +
                '}';
    }

    @Override
    protected Object clone() throws CloneNotSupportedException {
        return super.clone();
    }
}
public class Test {
    public static void main(String[] args)throws CloneNotSupportedException {
        Student student=new Student("张三",18);
        Student student1=(Student) student.clone();
        System.out.println(student);
        System.out.println(student1);
        student1.m.money=8;
    }
}
money一开始的值是24,但是我们将student1的money的值改变为8时,student的money的值也会变为24,因为上面代码只实现了浅克隆,没有实现深克隆。
上面的堆栈图如下
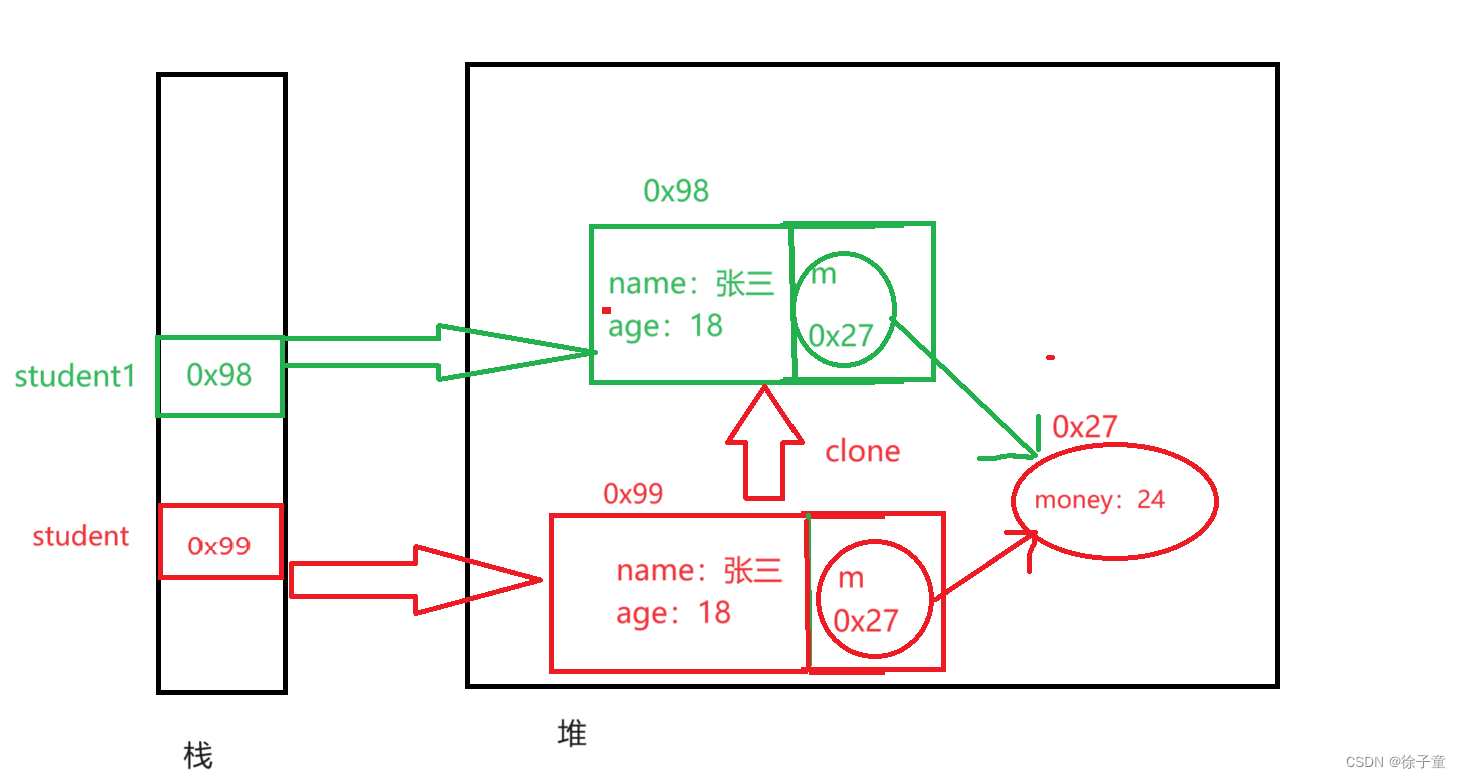
由于m的值都是克隆过来的,所以两个引用都指向一个money,修改了一个money的值,自然会影响两个的m指向的值。
想解决这个问题,我们直接克隆一份money就行了。如下面的堆栈图所示。
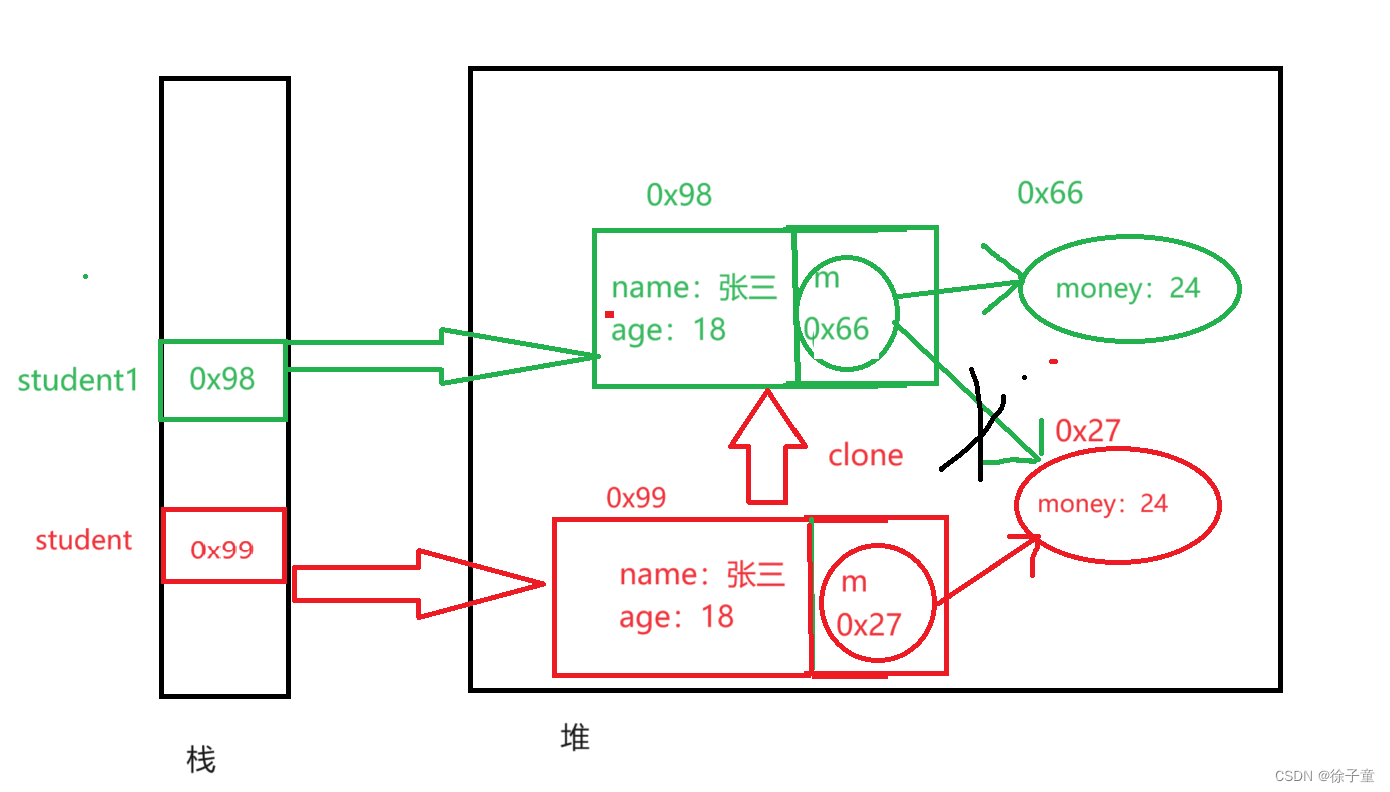
代码实现
class Money implements Cloneable{
    double money=24;

    @Override
    protected Object clone() throws CloneNotSupportedException {
        return super.clone();
    }
}
class Student implements Cloneable{
    public String name;
    public int age;
    Money m=new Money();
    public Student(String name,int age){
        this.name=name;
        this.age=age;
    }

    @Override
    public String toString() {
        return "Student{" +
                "name='" + name + '\'' +
                ", age=" + age +
                ", money=" + m.money +
                '}';
    }

    @Override
    protected Object clone() throws CloneNotSupportedException {
        Student tmp=(Student)super.clone();//克隆了Student里面的值
        tmp.m= (Money) this.m.clone();//克隆money
        return tmp;
    }
}
public class Test {
    public static void main(String[] args)throws CloneNotSupportedException {
        Student student=new Student("张三",18);
        Student student1=(Student) student.clone();
        System.out.println(student);
        System.out.println(student1);
        student1.m.money=8;
        System.out.println("修改student1的money的值后");
        System.out.println(student);
        System.out.println(student1);
    }
}
运行代码
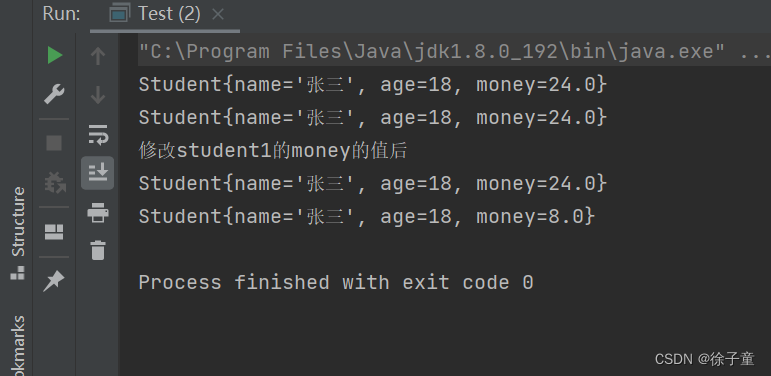
到这里深克隆就实现了。
3.总结
浅克隆克隆的是值,深克隆克隆的是引用。
文章来源:https://blog.csdn.net/2302_80826557/article/details/139220121
本文来自互联网用户投稿,该文观点仅代表作者本人,不代表本站立场。本站仅提供信息存储空间服务,不拥有所有权,不承担相关法律责任。如若内容造成侵权/违法违规/事实不符,请联系邮箱:jacktools123@163.com进行投诉反馈,一经查实,立即删除!
本文来自互联网用户投稿,该文观点仅代表作者本人,不代表本站立场。本站仅提供信息存储空间服务,不拥有所有权,不承担相关法律责任。如若内容造成侵权/违法违规/事实不符,请联系邮箱:jacktools123@163.com进行投诉反馈,一经查实,立即删除!
标签:

