首页 > 基础资料 博客日记
Spring Security权限控制框架使用指南
2024-02-27 11:00:05基础资料围观766次
在常用的后台管理系统中,通常都会有访问权限控制的需求,用于限制不同人员对于接口的访问能力,如果用户不具备指定的权限,则不能访问某些接口。
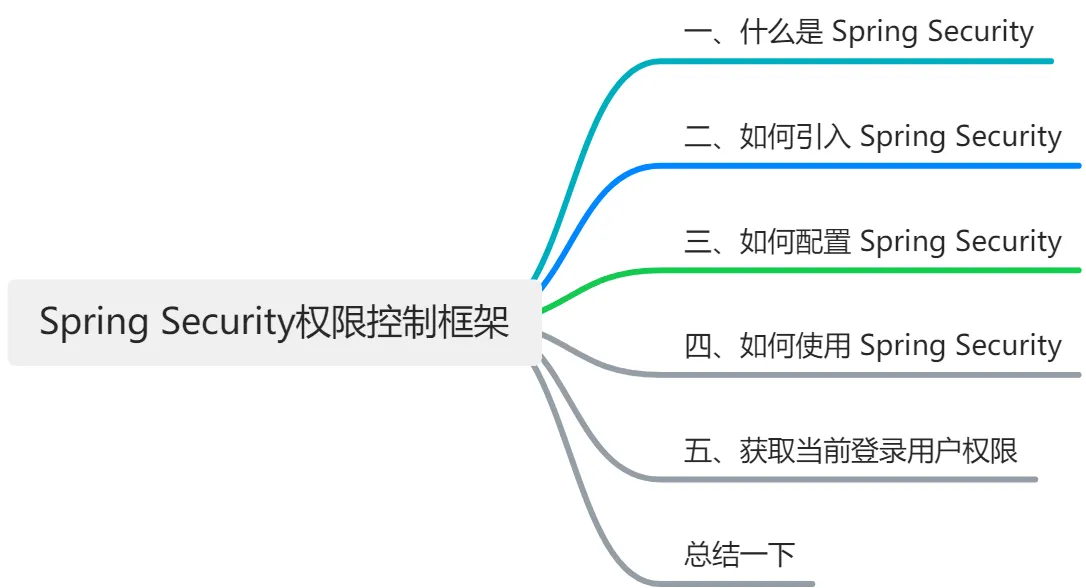
本文将用 waynboot-mall 项目举例,给大家介绍常见后管系统如何引入权限控制框架 Spring Security。大纲如下,

一、什么是 Spring Security
Spring Security 是一个基于 Spring 框架的开源项目,旨在为 Java 应用程序提供强大和灵活的安全性解决方案。Spring Security 提供了以下特性:
- 认证:支持多种认证机制,如表单登录、HTTP 基本认证、OAuth2、OpenID 等。
- 授权:支持基于角色或权限的访问控制,以及基于表达式的细粒度控制。
- 防护:提供了多种防护措施,如防止会话固定、点击劫持、跨站请求伪造等攻击。
- 集成:与 Spring 框架和其他第三方库和框架进行无缝集成,如 Spring MVC、Thymeleaf、Hibernate 等。
二、如何引入 Spring Security
在 waynboot-mall 项目中直接引入 spring-boot-starter-security 依赖,
<dependencies>
    <dependency>
        <groupId>org.springframework.boot</groupId>
        <artifactId>spring-boot-starter-security</artifactId>
        <version>3.1.0</version>
    </dependency>
</dependencies>
三、如何配置 Spring Security
在 Spring Security 3.0 中要配置 Spring Security 跟以往是有些不同的,比如不在继承 WebSecurityConfigurerAdapter。在 waynboot-mall 项目中,具体配置如下,
@Configuration
@EnableWebSecurity
@AllArgsConstructor
@EnableMethodSecurity(securedEnabled = true, jsr250Enabled = true)
public class SecurityConfig {
    private UserDetailsServiceImpl userDetailsService;
    private AuthenticationEntryPointImpl unauthorizedHandler;
    private JwtAuthenticationTokenFilter jwtAuthenticationTokenFilter;
    private LogoutSuccessHandlerImpl logoutSuccessHandler;

    @Bean
    public SecurityFilterChain filterChain(HttpSecurity httpSecurity) throws Exception {
        httpSecurity
                // cors启用
                .cors(httpSecurityCorsConfigurer -> {})
                .csrf(AbstractHttpConfigurer::disable)
                .sessionManagement(httpSecuritySessionManagementConfigurer -> {
                    httpSecuritySessionManagementConfigurer.sessionCreationPolicy(SessionCreationPolicy.STATELESS);
                })
                .exceptionHandling(httpSecurityExceptionHandlingConfigurer -> {
                    httpSecurityExceptionHandlingConfigurer.authenticationEntryPoint(unauthorizedHandler);
                })
                // 过滤请求
                .authorizeHttpRequests(authorizationManagerRequestMatcherRegistry -> {
                    authorizationManagerRequestMatcherRegistry
                            .requestMatchers("/favicon.ico", "/login", "/favicon.ico", "/actuator/**").anonymous()
                            .requestMatchers("/slider/**").anonymous()
                            .requestMatchers("/captcha/**").anonymous()
                            .requestMatchers("/upload/**").anonymous()
                            .requestMatchers("/common/download**").anonymous()
                            .requestMatchers("/doc.html").anonymous()
                            .requestMatchers("/swagger-ui/**").anonymous()
                            .requestMatchers("/swagger-resources/**").anonymous()
                            .requestMatchers("/webjars/**").anonymous()
                            .requestMatchers("/*/api-docs").anonymous()
                            .requestMatchers("/druid/**").anonymous()
                            .requestMatchers("/elastic/**").anonymous()
                            .requestMatchers("/message/**").anonymous()
                            .requestMatchers("/ws/**").anonymous()
                            // 除上面外的所有请求全部需要鉴权认证
                            .anyRequest().authenticated();
                })
                .headers(httpSecurityHeadersConfigurer -> {
                    httpSecurityHeadersConfigurer.frameOptions(HeadersConfigurer.FrameOptionsConfig::disable);
                });
                // 处理跨域请求中的Preflight请求(cors),设置corsConfigurationSource后无需使用
                // .requestMatchers(CorsUtils::isPreFlightRequest).permitAll()
                // 对于登录login 验证码captchaImage 允许匿名访问

        httpSecurity.logout(httpSecurityLogoutConfigurer -> {
            httpSecurityLogoutConfigurer.logoutUrl("/logout");
            httpSecurityLogoutConfigurer.logoutSuccessHandler(logoutSuccessHandler);
        });
        // 添加JWT filter
        httpSecurity.addFilterBefore(jwtAuthenticationTokenFilter, UsernamePasswordAuthenticationFilter.class);
        // 认证用户时用户信息加载配置,注入springAuthUserService
        httpSecurity.userDetailsService(userDetailsService);
        return httpSecurity.build();
    }
    @Bean
    public AuthenticationManager authenticationManager(AuthenticationConfiguration authenticationConfiguration) throws Exception {
        return authenticationConfiguration.getAuthenticationManager();
    }
    /**
     * 强散列哈希加密实现
     */
    @Bean
    public BCryptPasswordEncoder bCryptPasswordEncoder() {
        return new BCryptPasswordEncoder();
    }
}
这里详细介绍下 SecurityConfig 配置类,
- filterChain(HttpSecurity httpSecurity) 方法是访问控制的核心方法,这里面可以针对 url 设置是否需要权限认证、cors 配置、csrf 配置、用户信息加载配置、jwt 过滤器拦截配置等众多功能。
- authenticationManager(AuthenticationConfiguration authenticationConfiguration) 方法适用于启用认证接口,需要手动声明,否则启动报错。
- bCryptPasswordEncoder() 方法用户定义用户登录时的密码加密策略,需要手动声明,否则启动报错。
四、如何使用 Spring Security
要使用 Spring Security,只需要在需要控制访问权限的方法或类上添加相应的 @PreAuthorize 注解即可,如下,
@Slf4j
@RestController
@AllArgsConstructor
@RequestMapping("system/role")
public class RoleController extends BaseController {

    private IRoleService iRoleService;

    @PreAuthorize("@ss.hasPermi('system:role:list')")
    @GetMapping("/list")
    public R list(Role role) {
        Page<Role> page = getPage();
        return R.success().add("page", iRoleService.listPage(page, role));
    }
}
我们在 list 方法上加了 @PreAuthorize("@ss.hasPermi('system:role:list')") 注解表示当前登录用户拥有 system:role:list 权限才能访问 list 方法,否则返回权限错误。
五、获取当前登录用户权限
在 SecurityConfig 配置类中我们定义了 UserDetailsServiceImpl 作为我们的用户信息加载的实现类,从而通过读取数据库中用户的账号、密码与前端传入的账号、密码进行比对。代码如下,
@Slf4j
@Service
@AllArgsConstructor
public class UserDetailsServiceImpl implements UserDetailsService {

    private IUserService iUserService;

    private IDeptService iDeptService;

    private PermissionService permissionService;

    public static void main(String[] args) {
        BCryptPasswordEncoder bCryptPasswordEncoder = new BCryptPasswordEncoder();
        System.out.println(bCryptPasswordEncoder.encode("123456"));
    }

    @Override
    public UserDetails loadUserByUsername(String username) throws UsernameNotFoundException {
        // 1. 读取数据库中当前用户信息
        User user = iUserService.getOne(new QueryWrapper<User>().eq("user_name", username));
        // 2. 判断该用户是否存在
        if (user == null) {
            log.info("登录用户:{} 不存在.", username);
            throw new UsernameNotFoundException("登录用户:" + username + " 不存在");
        }
        // 3. 判断是否禁用
        if (Objects.equals(UserStatusEnum.DISABLE.getCode(), user.getUserStatus())) {
            log.info("登录用户:{} 已经被停用.", username);
            throw new DisabledException("登录用户:" + username + " 不存在");
        }
        user.setDept(iDeptService.getById(user.getDeptId()));
        // 4. 获取当前用户的角色信息
        Set<String> rolePermission = permissionService.getRolePermission(user);
        // 5. 根据角色获取权限信息
        Set<String> menuPermission = permissionService.getMenuPermission(rolePermission);
        return new LoginUserDetail(user, menuPermission);
    }
}
针对 UserDetailsServiceImpl 的代码逻辑进行一个讲解,大家可以配合代码理解。
- 读取数据库中当前用户信息
- 判断该用户是否存在
- 判断是否禁用
- 获取当前用户的角色信息
- 根据角色获取权限信息
总结一下
本文给大家讲解了后管系统如何引入权限控制框架 Spring Security 3.0 版本以及代码实战。相信能帮助大家对权限控制框架 Spring Security 有一个清晰的理解。后续大家可以按照本文的使用指南一步一步将 Spring Security 引入到的自己的项目中用于访问权限控制。
想要获取 waynboot-mall 项目源码的同学,可以关注我公众号【程序员wayn】,回复 waynboot-mall 即可获得。
如果觉得这篇文章写的不错的话,不妨点赞加关注,我会更新更多技术干货、项目教学、实战经验分享的文章。
本文来自互联网用户投稿,该文观点仅代表作者本人,不代表本站立场。本站仅提供信息存储空间服务,不拥有所有权,不承担相关法律责任。如若内容造成侵权/违法违规/事实不符,请联系邮箱:jacktools123@163.com进行投诉反馈,一经查实,立即删除!
标签:

