首页 > 基础资料 博客日记
Spring笔记
2023-09-14 16:25:21基础资料围观752次
1.ioc
1 pom导包spring-mvc
2 创建资源文件xml、pojo对象()
3 资源文件中配置bean,对pojo对象属性
4 测试中直接getBean获取。
1.1 一些不重要的
取别名:在资源文件中取别名,一种是直接在bean标签中用name,另一种是单独设置标签alias
合并配置:在资源配置文件中标签import可以导入合并
1.2 依赖(属性)注入
1.2.1 构造器注入
<constructor-arg index/type/name= vlaue="">

1.2.2 set注入
这是在默认无参的情况下。各种类型情况下。
value是直接命名值,ref表示引用值。
<?xml version="1.0" encoding="UTF-8"?>
<beans xmlns="http://www.springframework.org/schema/beans"
       xmlns:xsi="http://www.w3.org/2001/XMLSchema-instance" xmlns:jdbc="http://www.springframework.org/schema/jdbc"
       xsi:schemaLocation="http://www.springframework.org/schema/beans
        https://www.springframework.org/schema/beans/spring-beans.xsd http://www.springframework.org/schema/jdbc http://www.springframework.org/schema/jdbc/spring-jdbc.xsd">

    <bean id="address" class="com.kuang.pojo.Address">
        <property name="address" value="河南"/>
    </bean>

    <bean id="student" class="com.kuang.pojo.Student">
        <!--    第一种注入:普通值注入,value-->
        <property name="name" value="houshuaixin"/>

        <!--    第二种注入:bean注入,ref-->
        <property name="address" ref="address"/>

        <!--    第三种注入:数组的注入-->
        <property name="books">
            <array>
                <value>红楼梦</value>
                <value>西游记</value>
                <value>水浒传</value>
                <value>三国演义</value>
            </array>
        </property>

        <!--    list注入-->
        <property name="hobbys">
            <list>
                <value>听歌</value>
                <value>敲代码</value>
                <value>看电影</value>
            </list>
        </property>

        <!--    Map注入-->
        <property name="card">
            <map>
                <entry key="身份证" value="1111111"/>
                <entry key="银行卡" value="2222222"/>
            </map>
        </property>


        <!--    Set注入-->
        <property name="games">
            <set>
                <value>CF</value>
                <value>LOL</value>
                <value>BOB</value>
            </set>
        </property>

        <!--    null注入-->
        <property name="wife">
            <null></null>
        </property>

        <!--    Properties注入-->
        <property name="info">
            <props>
                <prop key="学号">215151</prop>
                <prop key="性别">男</prop>
            </props>
        </property>

    </bean>

</beans>
1.2.3 拓展方式注入(p、c命名空间)
头文件取xmlns到schema/p或者c
xmlns:p="http://www.springframework.org/schema/p"
       xmlns:c="http://www.springframework.org/schema/c"
<?xml version="1.0" encoding="UTF-8"?>
<beans xmlns="http://www.springframework.org/schema/beans"
       xmlns:xsi="http://www.w3.org/2001/XMLSchema-instance" xmlns:jdbc="http://www.springframework.org/schema/jdbc"
       xmlns:p="http://www.springframework.org/schema/p"
       xmlns:c="http://www.springframework.org/schema/c"
       xsi:schemaLocation="http://www.springframework.org/schema/beans
        https://www.springframework.org/schema/beans/spring-beans.xsd http://www.springframework.org/schema/jdbc http://www.springframework.org/schema/jdbc/spring-jdbc.xsd">

    <!--P命名空间注入,可以直接注入属性的值:property-->
    <bean id="user" class="com.kuang.pojo.User" p:name="狂神" p:age="32"/>

    <!--C命名空间注入,通过构造器注入:construct-args-->
    <bean id="user2" class="com.kuang.pojo.User" c:age="18" c:name="狂神"/>

</beans>
1.3 Bean的作用域
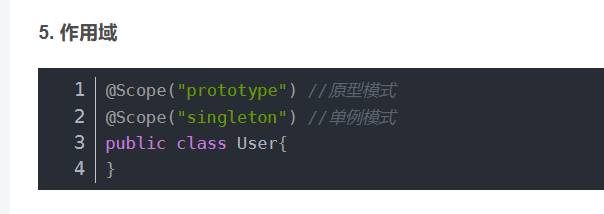
在配置bean时,有一个标签scope
sington:默认的单例模式,前后getBean相同。
prototype:原型模式,每次getBean都会产生一个新对象。
1.4 Bean的自动装配方式
1.4.1 在xml中显式的自动装配
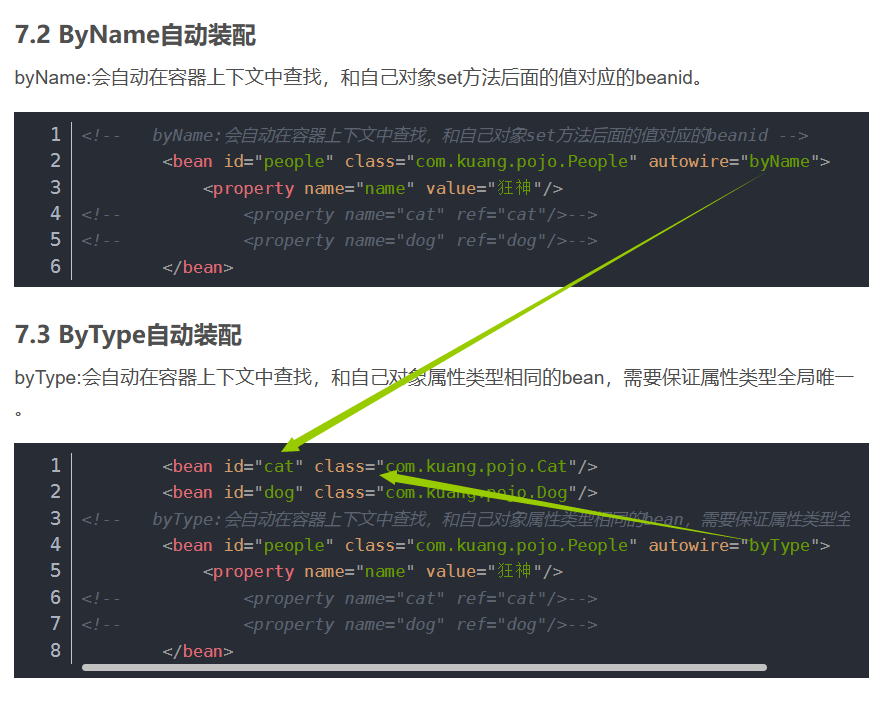
类People中属性依赖了一个类Cat,手动配置是在bean中用<property >指定,自动配置是在标签bean中添加属性autowire=""
- byName:找自己的setX方法名字的X,与bean容器中是否有符合的。(bean的id和自己的属性名)
- byType: 过Bean的Class类型来自动装配。使用autowire byType首先需要保证:同一类型的对象,在spring容器中唯一。
1.4.2 使用spring注解的自动装配 @Autowired
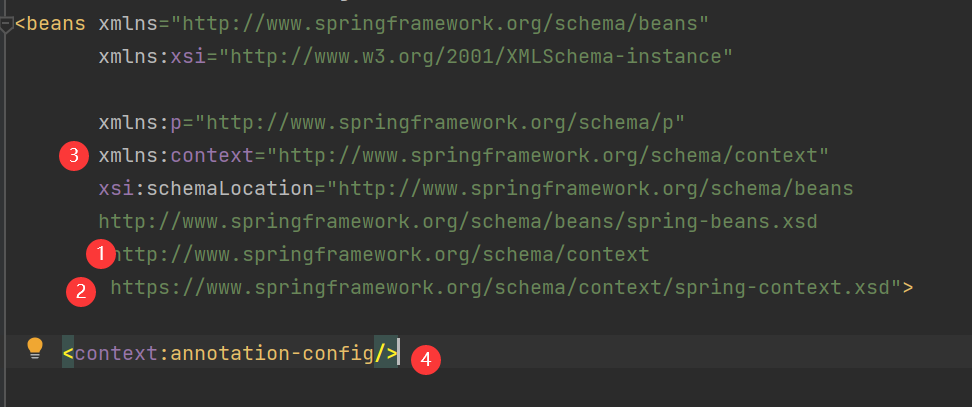
在资源配置文件中开启注解支持
- 添加schemaLocation,两行的beans换成context
- 再添加context的命名空间
- 配置属性标签
<context:annotation-config/>
@Autowired:可以用在属性,也可以用在set方法。
- 其括号中可添加属性required,为false时说明对象可以为null。
- 按照byType方式装配,出现多个类型时,可以在下再添注解@Qualifer(value="") 来指定具体的bean
1.4.3 使用javaee提供的注解 @Resource
先开启注解支持
然后用法和autowired相同,不同的是:
- @Autowired通过byType的方式实现,而且必须要求这个对象存在。【常用】
- @Resource默认通过byName的方式实现(加入参数name=""),如果找不到名字,则通过byType实现,两种都找不到,报错。
1.5 使用注解开发
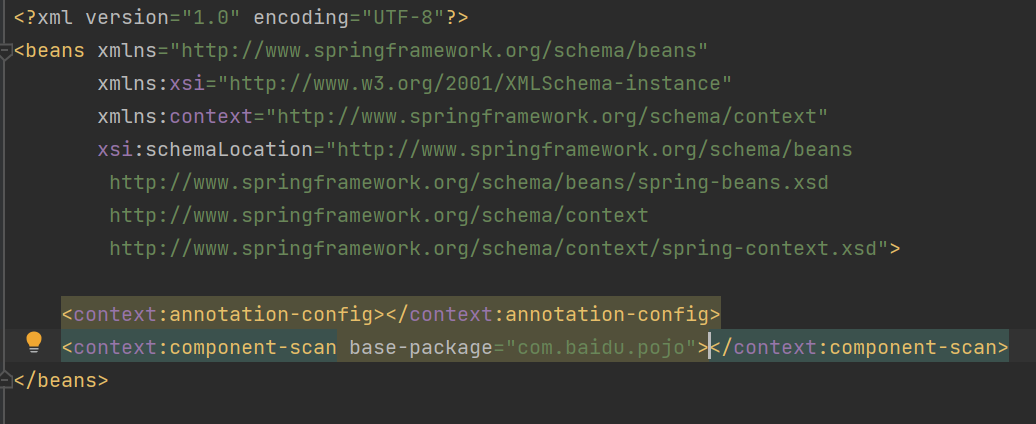
再配置文件中配置:
- 开起注解支持
- 扫描包,包中注解就会生效(找bean的)
注解
@component注解相当于一个<bean>的注册。
@Value()相当于一个<bean\ <property>注入属性
@Component有几个衍生的注解,在web开发中,会按照mvc三层架构分层。
dao层 【@Repository】
service层 【@Service】
controller层 【@Controller】
1.5 Java配置Spring
这种是没有xml文件来配置的。在SpringBoot见的多。
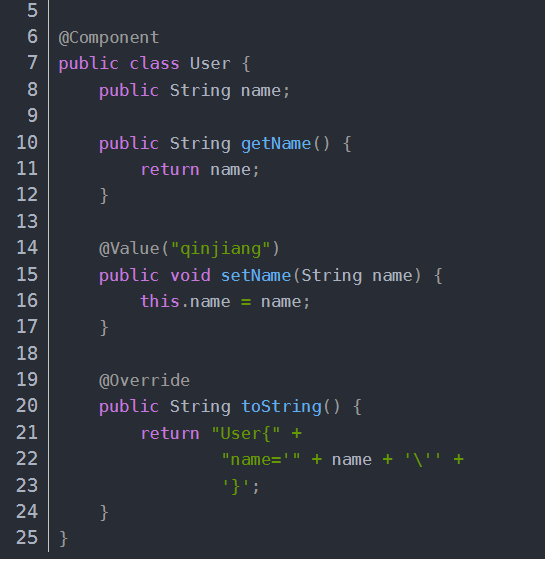
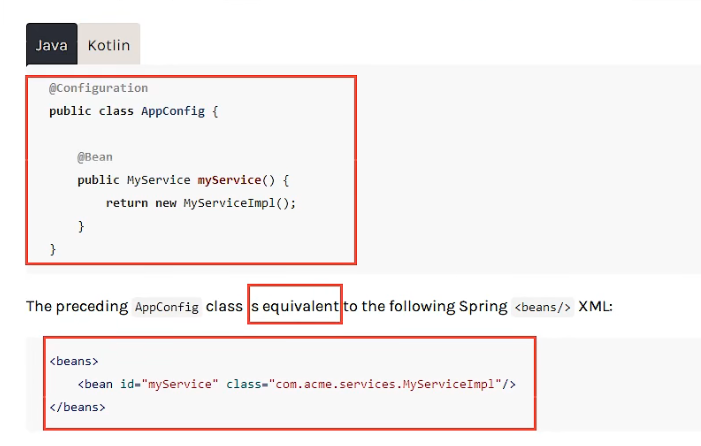
重点:
@Configuration + @Bean等价于
配置文件+<bean\ id class>
.@ComponentScan("包") 等价于 配置文件的的扫描bean
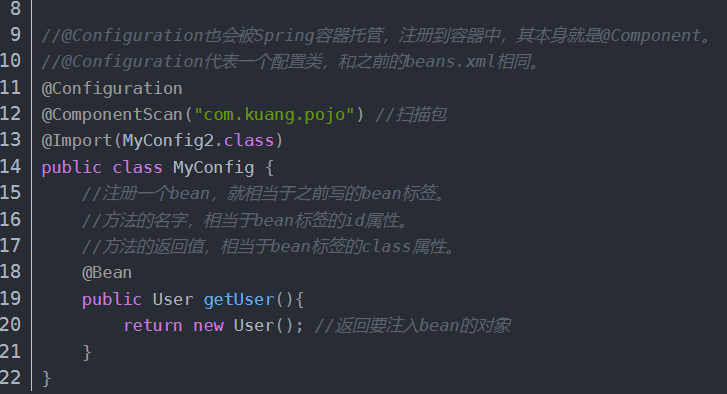
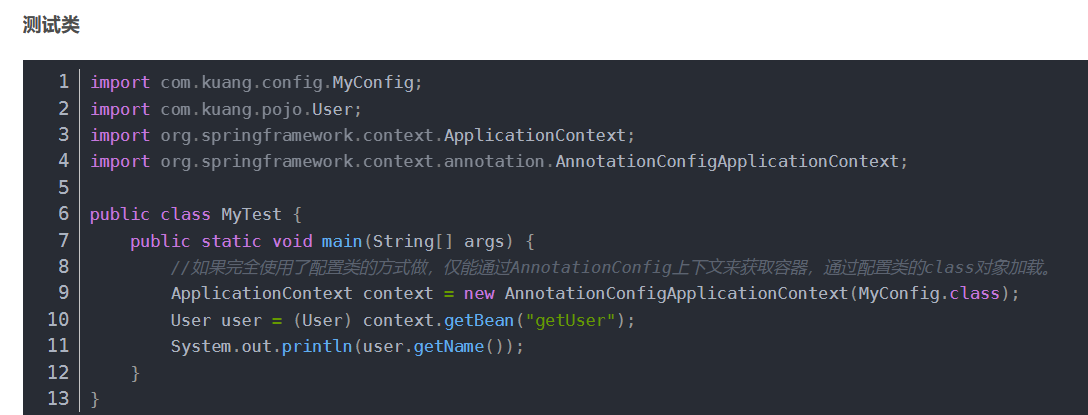
测试通过AnnotationConfigApplicationContext获取容器上下文,传入的是配置类的类名。
2. AOP
2.1 代理模式
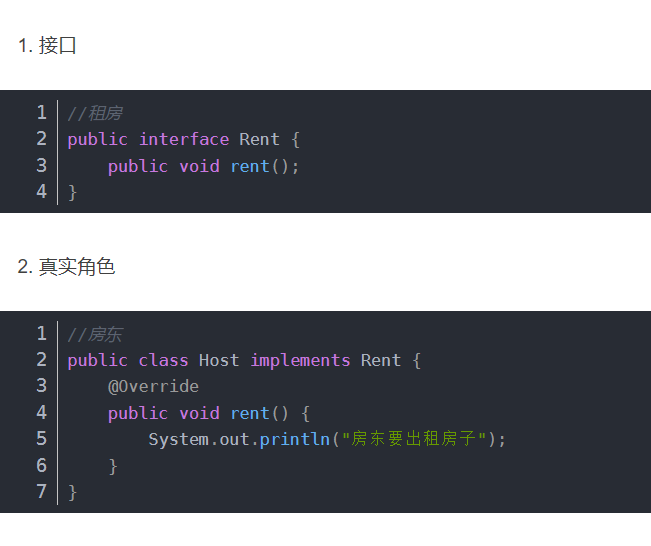
静态代理
中介(代理角色)和房东(真实角色)都实现接口出租,中介组合房东属性,在实现接口函数中除房东方法外还有自己的处理实现。 客户只根代理角色接触即可。
动态代理
房东实现出租接口。
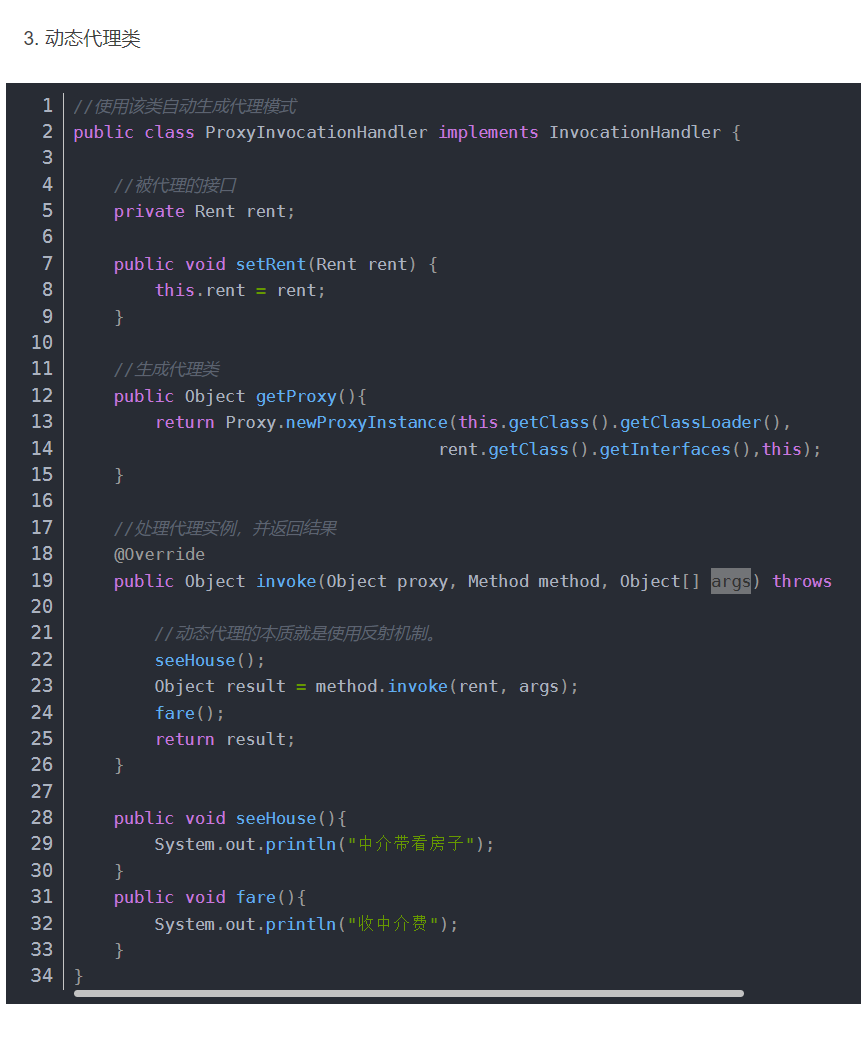
另外创建一个类实现InocationHandler接口,添加一个代理的接口属性(出租)。添加set或构造器方法能赋值接口。添加一个方法getProxy() 固定代码:return Proxy.get~ 这里Proxy有静态方法可以返回一个代理对象。
实现InvocationHandler接口的方法Invoke,通过反射机制来调用属性接口方法,在Invoke的方法中前后可添加代理角色的方法。
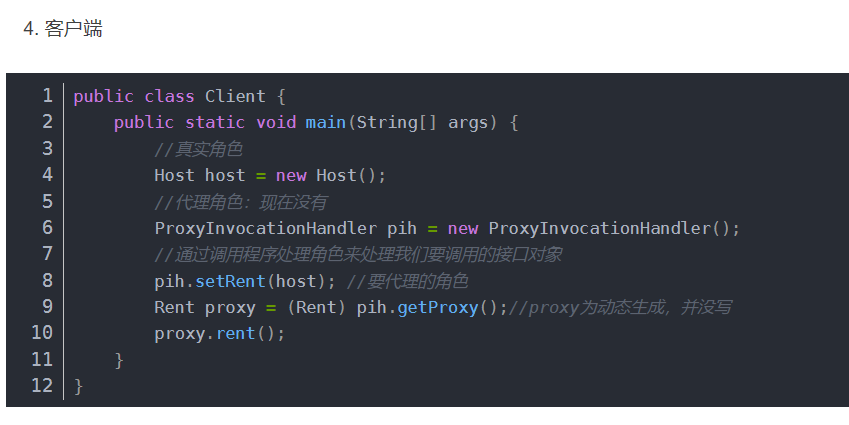
客户角色先创建房东,再创建实现类,将房东传入实现类(构造器或set),然后调用getProxy得到代理类,最后直接调用代理类的方法即可。
2.2 AOP
导入依赖包aspectjweaver(不过测试的时候,没有这个也可以)
2.1 通过spring实现AOP
service层定义接口和实现。
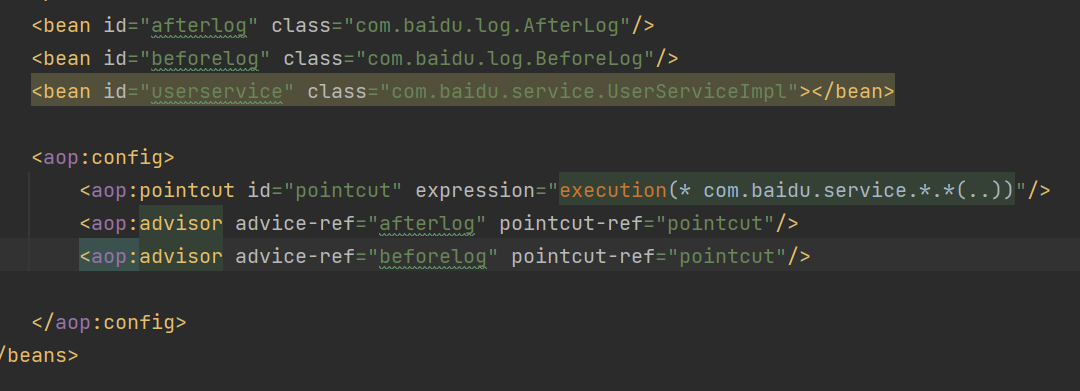
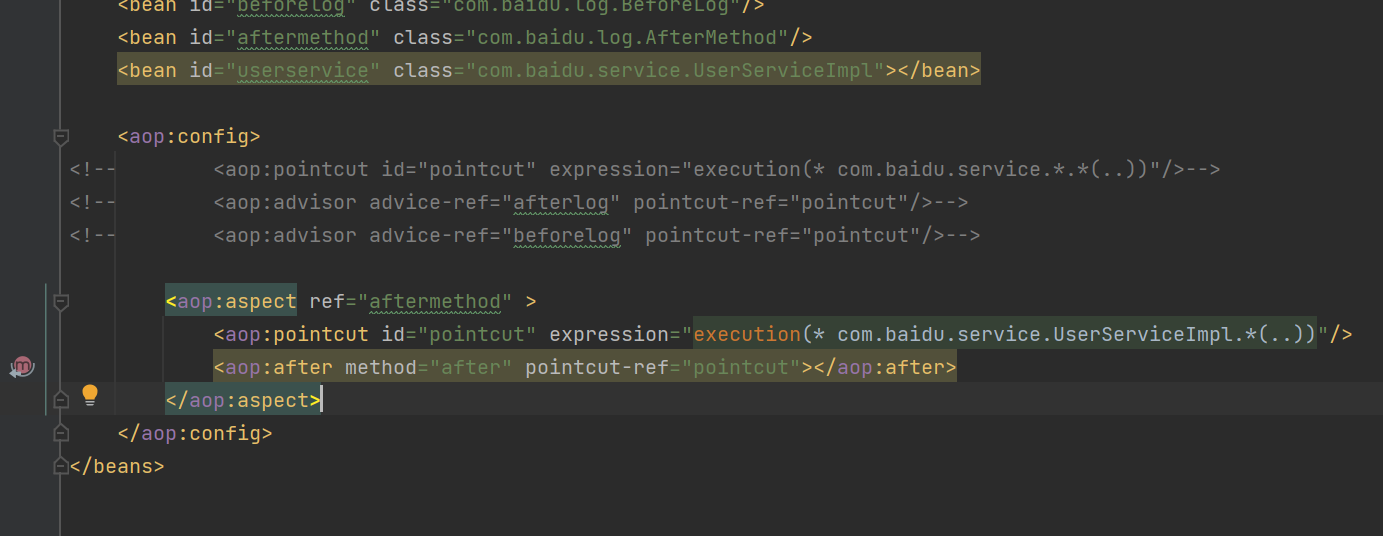
Aop层定义一些个”切面“类,类中定义“通知”。 定义的类实现methodbefore、afterreturn~等接口。(SPring通过反射实现代理)
配置文件配置,把aop层和service层的实现类定义bean,另外配置aop-config。其中配置切入点和通知即可。

2.2 自定义实现AOP
这个真的要导包了。
自定义类和方法作为代理的添加。
再配置文件中注册自定义类,通过aspect自定义切面,引入自定义类。在其中再定义切入点pointcut,和“通知”after,before~
2.3 通过注解实现AOP
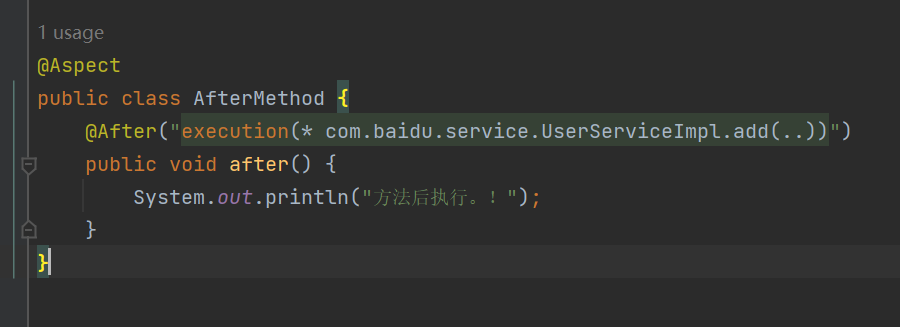
加入注解支持。
<aop:aspectj-autoproxy></aop:aspectj-autoproxy>
使用注解
@Aspect定义切面,每个通知前通过注解@After,before告知切入点
3. spring整合Mybatis
3.1 常规的
导入一些包,spring-mvc,mybatis,mysql,spring-jdbc
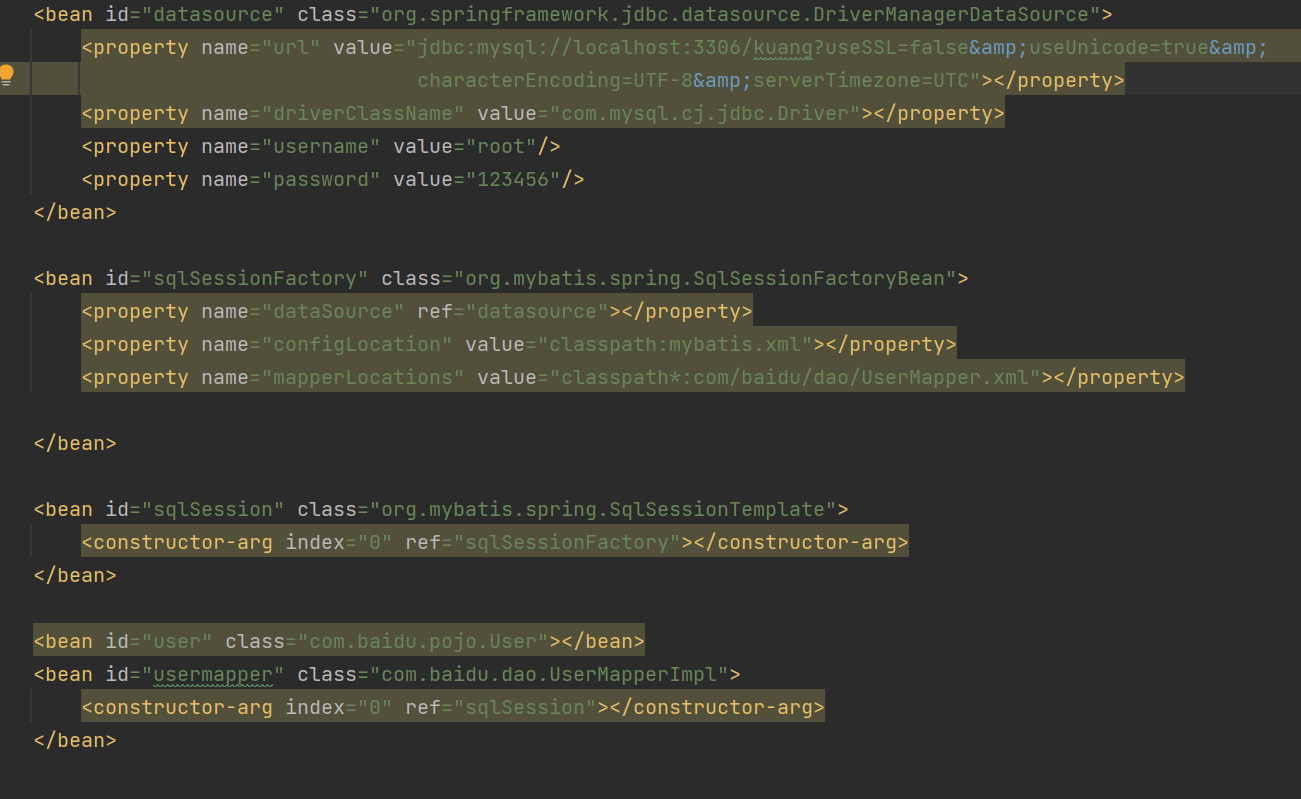
spring配置文件中:
- 配置datasource class=...datasource/DriverManagerDataSource
- 配置数据库的url,用户名,密码,jdbcDriver。url需要配置时区。
- 配置sqlSessionFactory class=.../SqlSessionFactoryBean
- 配置MapperLocation,和datasource。还有个configLocaltion连接mybatis配置文件的,可以不要。
- 配置sqlSession class=.../SqlSessionTemplate
- 只能通过构造器配置传入sqlSessionFactory
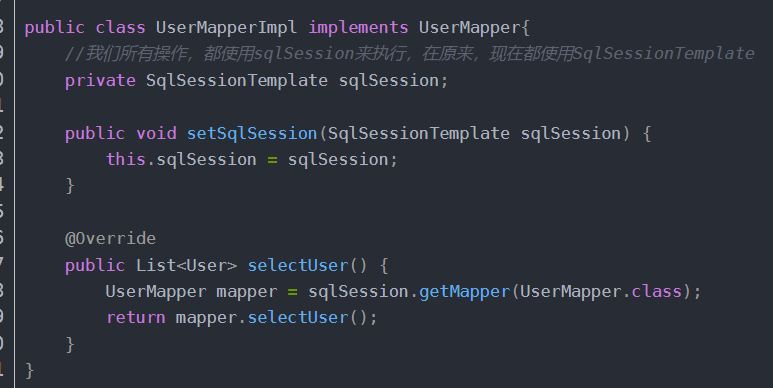
- 配置mapper class=mapperImpl,传入sqlSession
在Dao层: - mapper的java、xml;再加一个mapper接口shixianleimapperImpl,这样测试的时候因为已经注入bean了,可以直接调用。
3.2 方式二继承SqlSessionDaoSupport
可以通过getSession方法直接获取session。
那么再注入时,只需要注入一个sqlsessionFactory即可,比上一个步骤少一步注入sqlsession的操作。

4. 事务
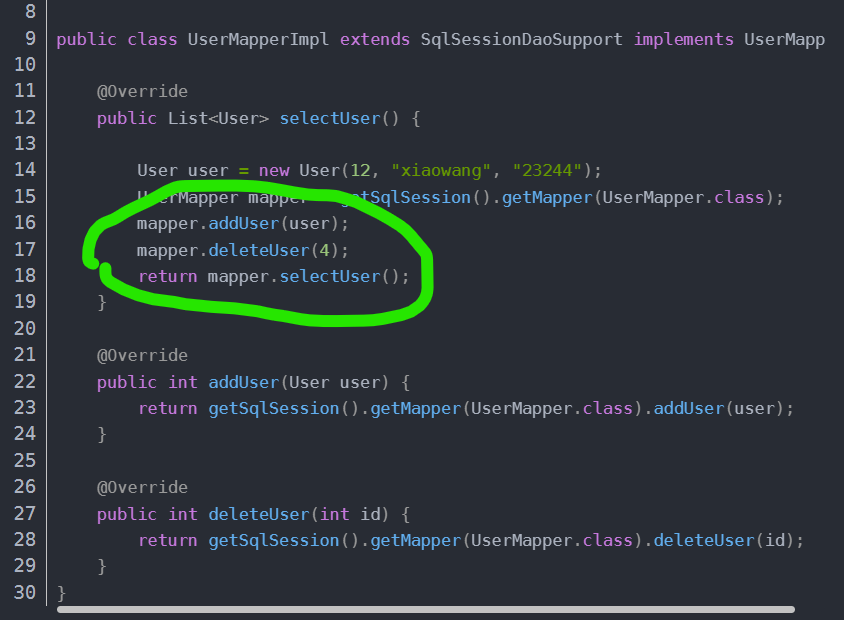
这个地方模拟,事务开启前,插入成功,删除失败。(删除语法有错)
声明式事务
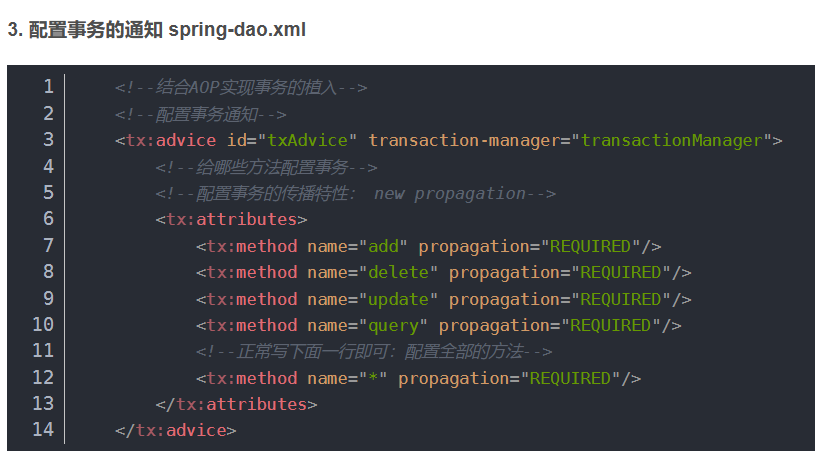
SPring通过AOP的方式支持声明式事务管理。



本文来自互联网用户投稿,该文观点仅代表作者本人,不代表本站立场。本站仅提供信息存储空间服务,不拥有所有权,不承担相关法律责任。如若内容造成侵权/违法违规/事实不符,请联系邮箱:jacktools123@163.com进行投诉反馈,一经查实,立即删除!
标签:

