首页 > 基础资料 博客日记
JAVA IO流知识点全总结
2023-09-06 17:51:20基础资料围观553次
文件的创建方式
首先查看File类的构造器,得出有三种常见的创建方式

直接传入构建的文件路径,通过构造器 File(String pathname),直接传入文件路径,以下为演示代码(在IO流的操作中总是伴随着编译时异常,可使用Alt+Enter快捷键进行异常捕获或者抛出)
public void create01()  {
    String filePath = "d:\\IOTest\\test1.txt";
    File file = new File(filePath);
    try {
        file.createNewFile();
        System.out.println("文件创建成功");
    } catch (IOException e) {
        e.printStackTrace();
    }
}
指定父目录文件,即指定文件夹文件+子路径文件,通过构造器File(File parent,String child)进行创建文件
public void create02() {
    File parentFile = new File("d:\\IOTest");
    String fileName = "test2.txt";
    File file = new File(parentFile, fileName);

    try {
        file.createNewFile();
        System.out.println("创建成功");
    } catch (IOException e) {
        e.printStackTrace();
    }
}
直接指定父目录和文件名称,通过构造器 File(String parent,String child)
public void create03() {
    String parentPath = "d:\\IOTest";
    String fileName = "test3.txt";
    File file = new File(parentPath, fileName);
    try {
        file.createNewFile();
        System.out.println("创建成功");
    } catch (IOException e) {
        e.printStackTrace();
    }
}
常用的文件操作
查看文件信息
File 文件类的api文档,从中我们可以看到File类提供了许多api供我们查看文件信息,无需死记硬背,需要查阅api文档即可
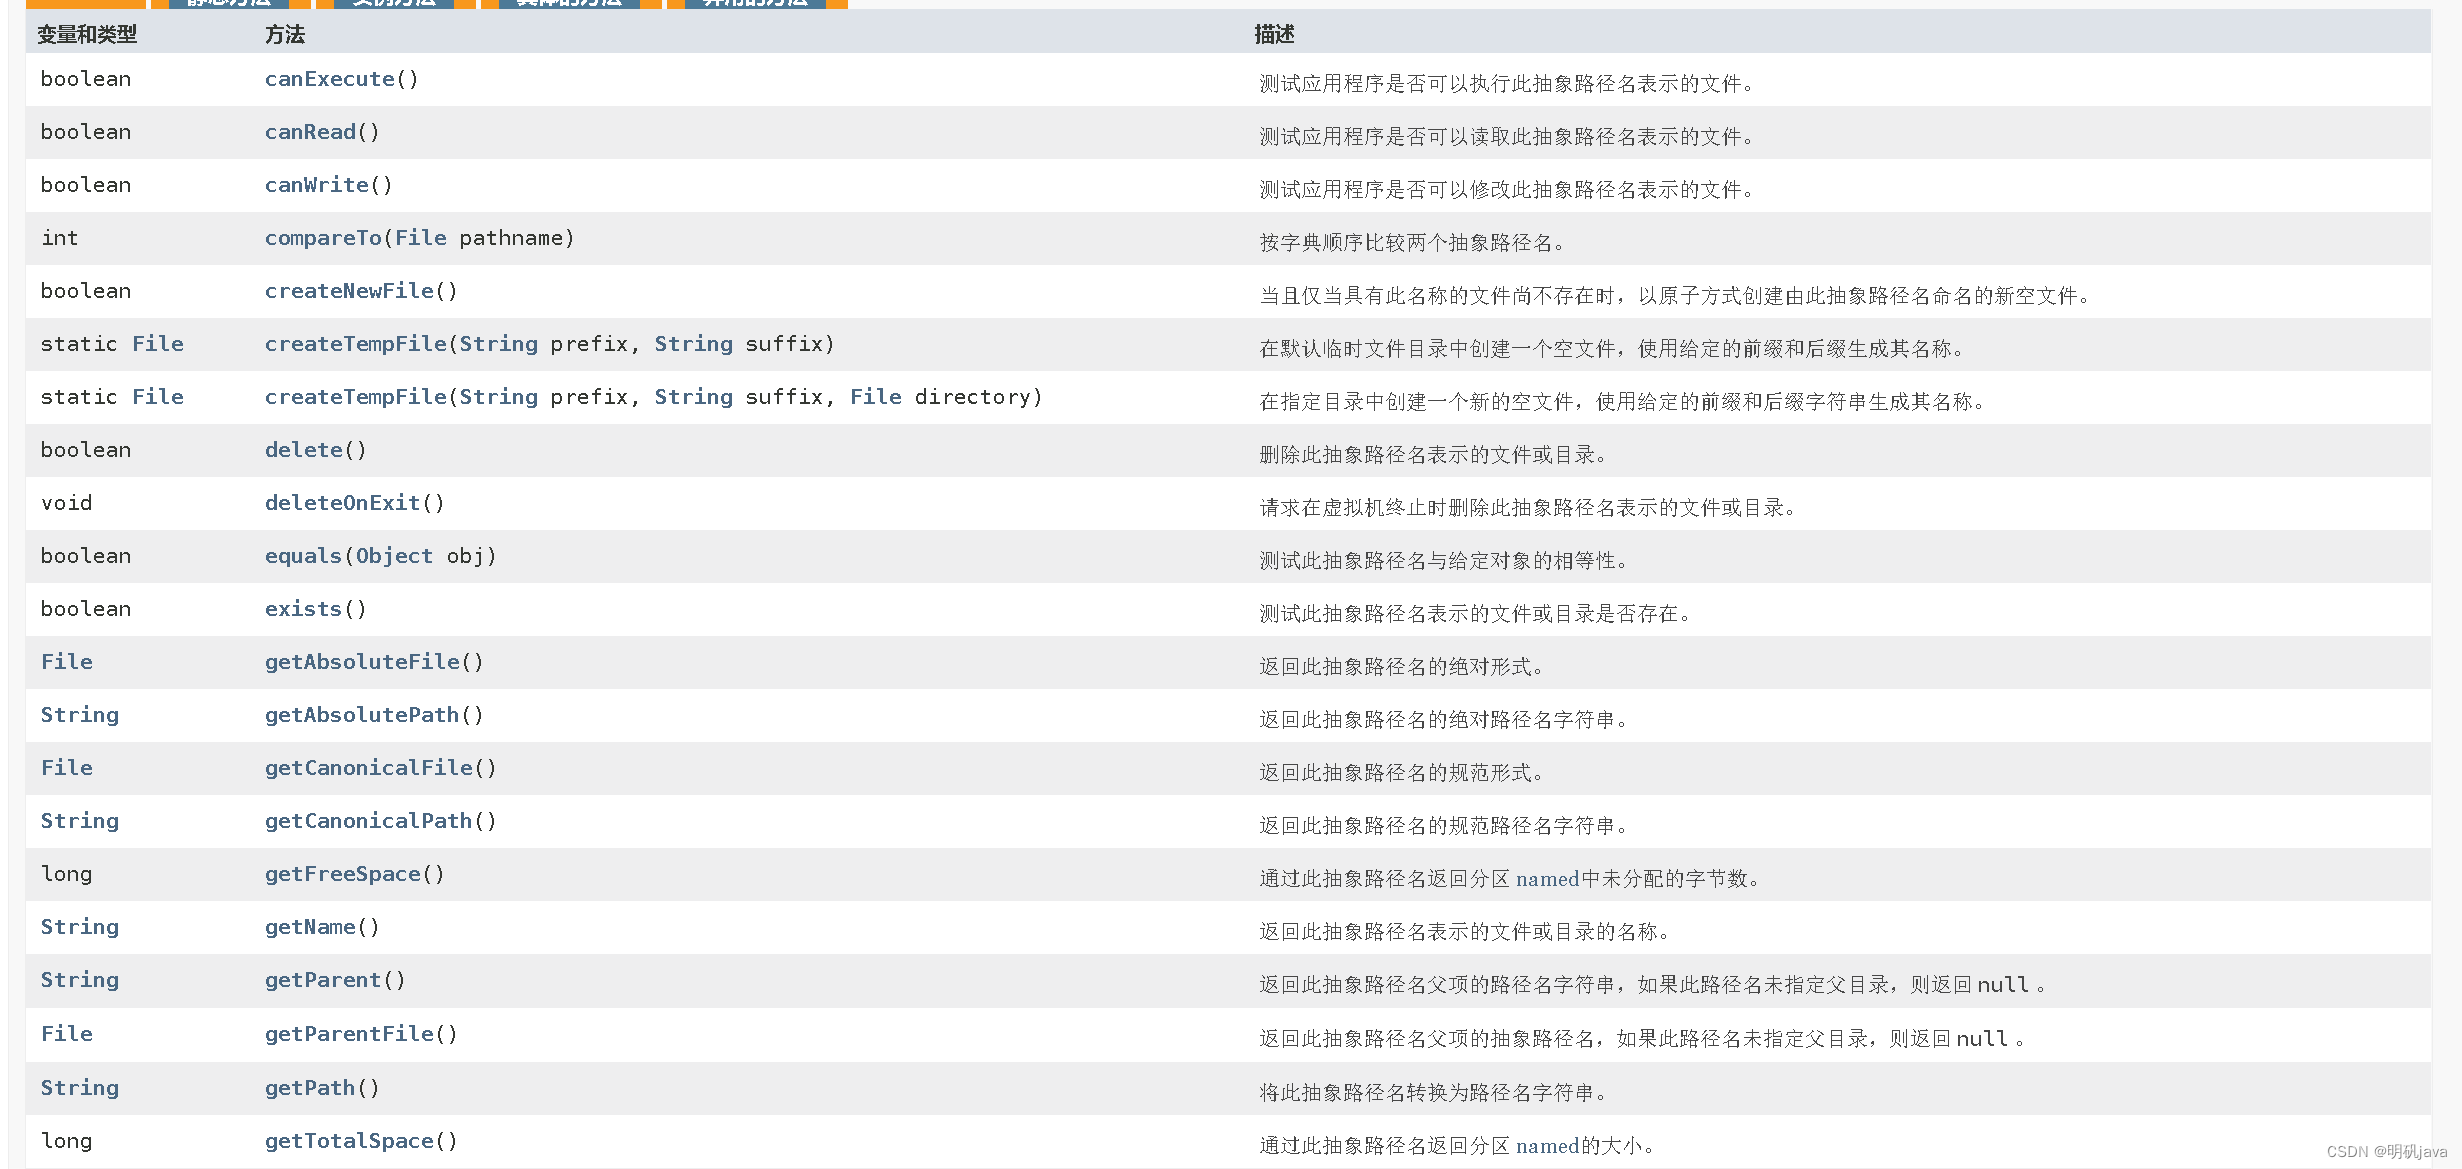
以下是获取文件常用信息的api示例
public void info(){
    File file = new File("d:\\IOTest\\test1.txt");
    System.out.println("文件名字="+file.getName());
    System.out.println("文件的绝对路径="+file.getAbsolutePath());
    System.out.println("文件父级目录="+file.getParent());
    System.out.println("文件大小(字节)="+file.length());
    System.out.println("文件是否存在="+file.exists());
    System.out.println("是不是一个文件="+file.isFile());
    System.out.println("是不是一个目录="+file.isDirectory());
}
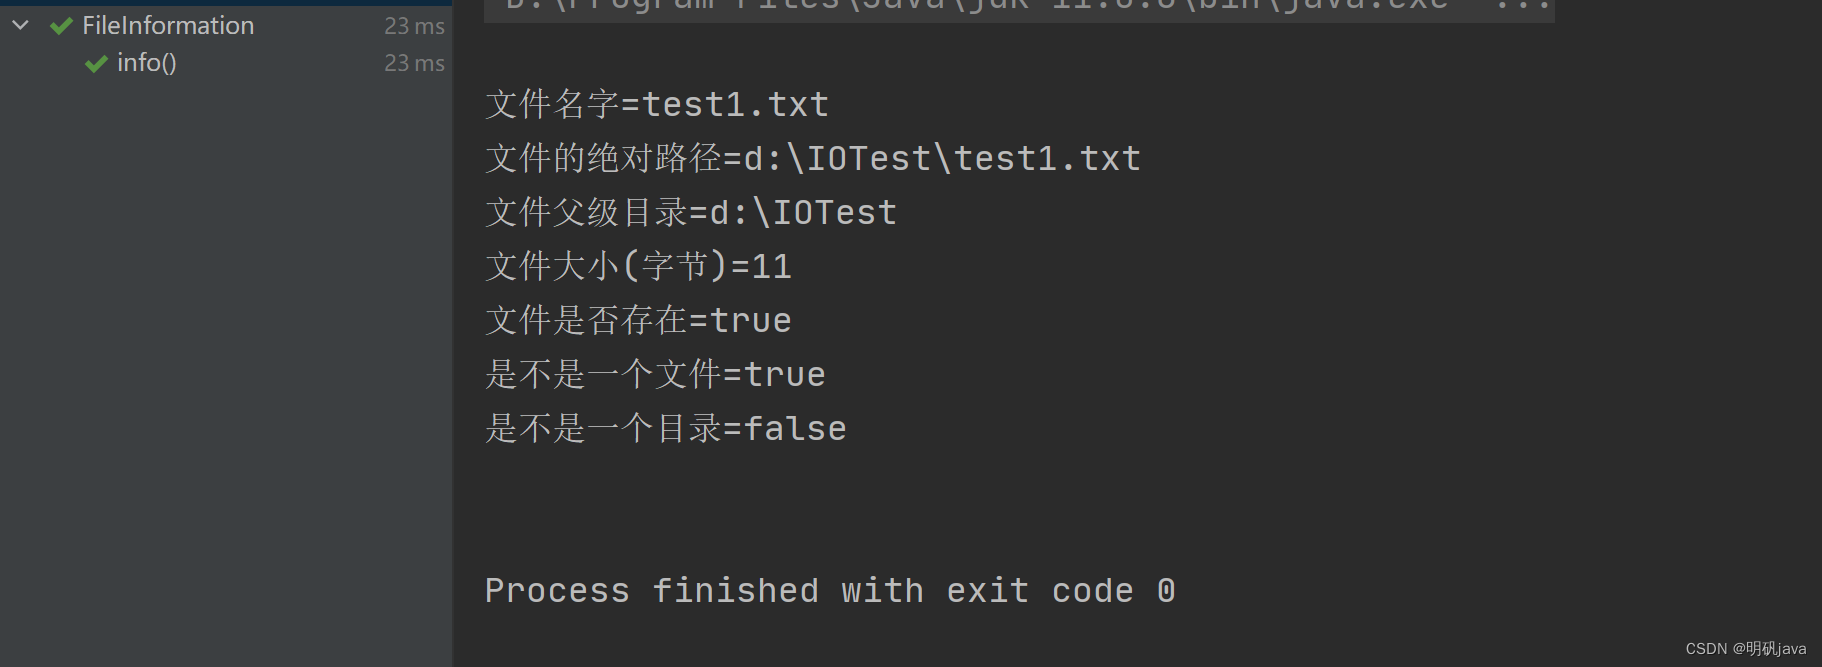
文件删除
只要指定文件路径,创建File对象,调用delete方法即可完成删除,删除目录时,需要保证目录为空目录,否则会删除失败,但不会抛出异常
String filePath = "d:\\IOTest\\test2.txt";
File file = new File(filePath);
if(file.exists()){
    if(file.delete()){
        System.out.println(filePath+"删除成功");
    }else{
        System.out.println(filePath+"删除失败");
    }
}else{
    System.out.println("该文件不存在...");
}
创建目录
创建一级目录可以直接调用mkdir(),即可成功创建,但如果是创建多级目录,就需要采用mkdirs,否则会创建目录失败,但不会抛出异常
public void m3(){
    String directoryPath = "D:\\demo\\a\\b\\c";
    File file = new File(directoryPath);
    if(file.exists()){
        System.out.println(directoryPath+"存在...");
    }else{
        if(file.mkdirs()){
            System.out.println(directoryPath+"创建成功...");
        }else{
            System.out.println(directoryPath+"创建失败");
        }
    }
}
IO 流原理及流的分类
IO概念
I/O是Input/Output的缩写,I/O技术是非常实用的技术,用于处理数据传输、网络通信、读写文件,java.io包中提供了各种流的接口的类和接口,用以处理不同的数据,并通过api输入或输出数据
输入 Input:指的是数据从磁盘中输入到内存中来
输出 Output:指的是数据从内存输出到磁盘中去
IO流的分类
按操作数据类型分类:分为字节流(处理二进制文件如音频、图片、视频等)和字符流(处理文本)
按数据流的流向分类:分为输入流和输出流
按流的角色不同分类:节点流,处理流/包装流(装饰器模式)
| 抽象基类 | 字节流 | 字符流 |
|---|---|---|
| 输入流 | InputStream | Reader |
| 输出流 | OutputStream | Writer |
文件与流
文件与流就相当于商品与包裹之间的关系,商品需要包装成包裹才能运输,而文件中的信息也需要转化为流才能在磁盘与内存之间传输而包裹里面已经包含了商品,如果复制商品的话,只需要复制一份一模一样的包裹即可,这也是为什么在复制文件时,只需要复制文件相应的输入流到输出流中,原因就是输入流已经有文件的全部信息,才能进行拷贝文件
IO流常用类
字节输入流 InputStream
InputStream作为抽象父类主要有以下子类
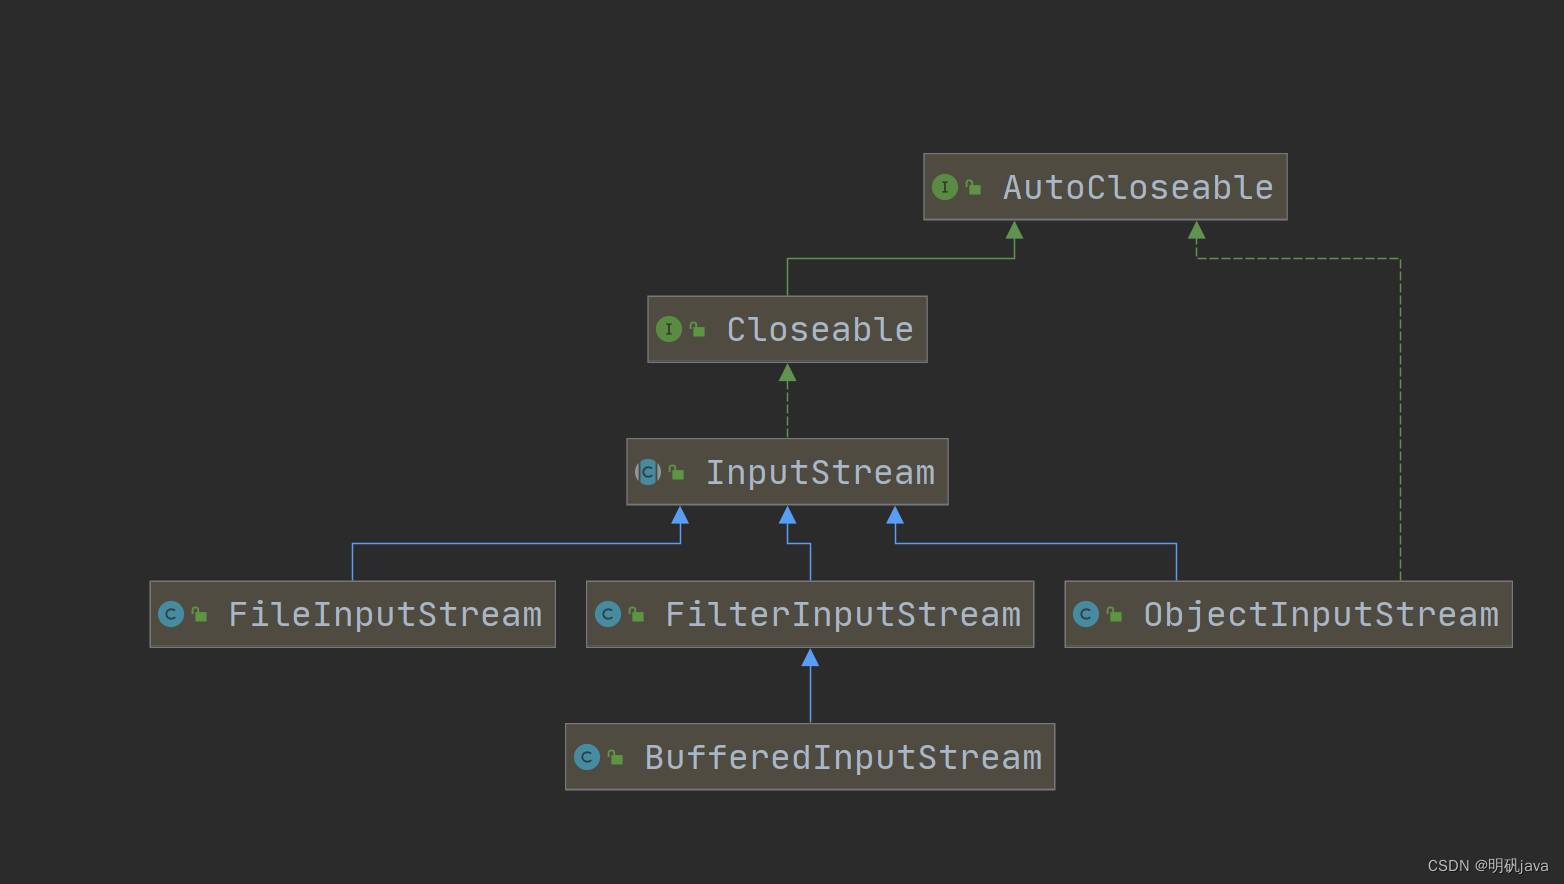
FileInputStream输入流
d盘提前准备好写有hello world的hello.txt文件,此时读入的整数均为每个字符的ASCII值,read方法在读取到文件末尾会返回-1表示已无字节可读
 		String filePath = "d:\\hello.txt";
        int readDate = 0;
        //提升作用域,用于在finally关闭输入流
        FileInputStream fileInputStream = null;
        try {
            fileInputStream = new FileInputStream(filePath);
            //一次读入一个字节,读到最后返回-1,表示无数据
            while ((readDate = fileInputStream.read()) != -1) {
                //每次将读入的字节数据转化为字符并输出
                System.out.print((char) readDate);
            }
        } catch (IOException e) {
            e.printStackTrace();
        } finally {
            try {
                //关闭流
                fileInputStream.close();
            } catch (IOException e) {
                e.printStackTrace();
            }
        }

上述方式带来了一个问题,就是每次从内存访问磁盘,只能读取一个字节,11个字节就要访问11次磁盘,学过操作系统的同学都知道,从内存访问磁盘本身这一行为就十分耗费时间,所以java的设计者为了解决这一问题,在FileInputStream的read()方法提供了一个缓冲区的方法重载,即可指定缓冲区的大小来决定一次访问磁盘能够读入的字节数量,从而减少了访问磁盘次数,优化性能。
  String filePath = "d:\\hello.txt";
        int readDate = 0;
//        指定一个8字节的字节数组作为缓冲区
        byte[] buf = new byte[8];
        FileInputStream fileInputStream = null;
        int readLen = 0;
        try {
            fileInputStream = new FileInputStream(filePath);
            while ((readLen = fileInputStream.read(buf)) != -1) {
//                每次将读取到的字节数据转为字符串输出
                System.out.print(new String (buf,0,readLen));
            }
        } catch (IOException e) {
            e.printStackTrace();
        } finally {
            try {
                fileInputStream.close();
            } catch (IOException e) {
                e.printStackTrace();
            }
        }
我们可以看到,在缓冲区字节数组中直接读入了8个字符的ASCII
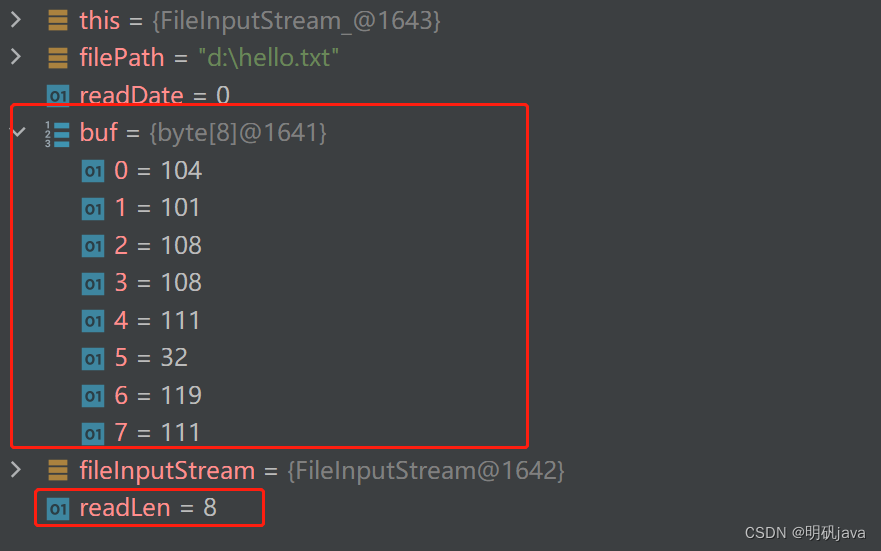
而没有缓冲区的每次只能读入一个,性能差距较大

字节输出流OutputStream
FileOutputStream
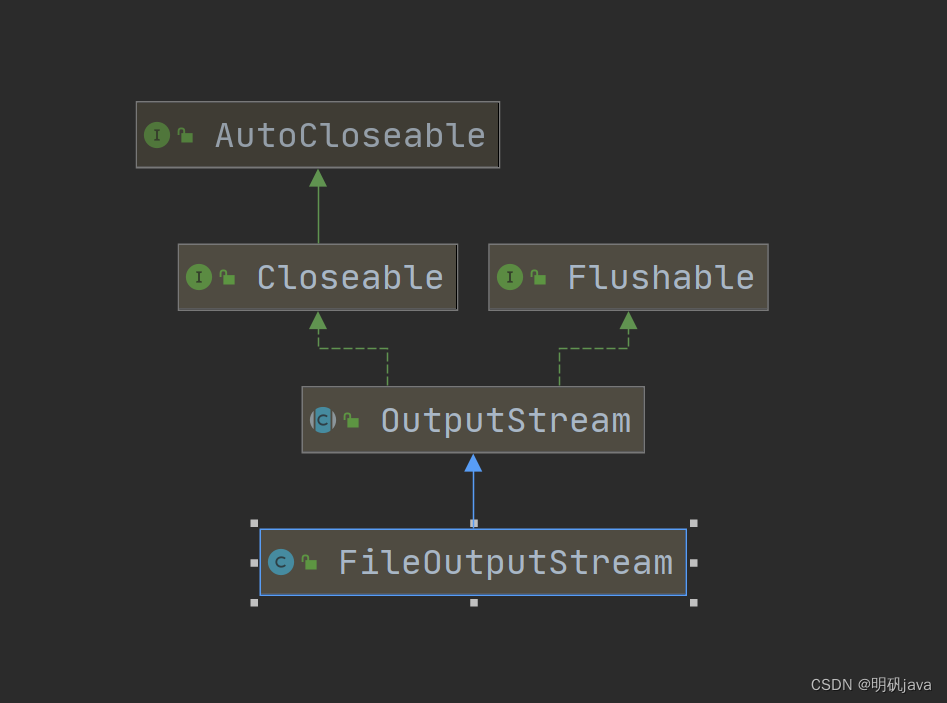
FileOutputStream的写入方式默认为覆盖原文件的内容,如果要采用追加写入的方式要在创建对象时将append赋值为true开启追加写入模式,同时在文件不存在时,会自动创建文件,但要保证目录是存在的

String filePath = "d:\\IOTest\\outTest.txt";
FileOutputStream fileOutputStream = null;
try {
    fileOutputStream = new FileOutputStream(filePath,true);
    String str = "hello,world";
    fileOutputStream.write(str.getBytes());
} catch (IOException e) {
    e.printStackTrace();
} finally {
    try {
        fileOutputStream.close();
    } catch (IOException e) {
        e.printStackTrace();
    }
利用FileOutputStream和FileInputStream实现文件拷贝
总体步骤分为两步
- 创建文件的输入流 , 将文件读入到程序
- 创建文件的输出流, 将读取到的文件数据,写入到指定的文件
 		//文件路径
        String srcFilePath = "D:\\IOTest\\3e405d5c5b640f81caac8b4e551f7f33841232cd_raw.jpg";
        //拷贝的文件路径
        String destFilePath = "D:\\IOTest\\kakaxi.jpg";
        //输出流
        FileOutputStream fileOutputStream = null;
        //输入流
        FileInputStream fileInputStream = null;
        try {
            fileInputStream = new FileInputStream(srcFilePath);
            fileOutputStream = new FileOutputStream(destFilePath);
            //开辟1024个字节的缓冲区
            byte[] buf = new byte[1024];
            int readLen = 0;
            while ((readLen = fileInputStream.read(buf)) != -1){
                //将读到的文件信息写入新文件
                fileOutputStream.write(buf,0,readLen);
            }
        } catch (IOException e) {
            e.printStackTrace();
        } finally {
            try {
                //判断非空,防止出现空指针异常
            if(fileInputStream!=null){
                    fileInputStream.close();
                }
            if(fileOutputStream!=null){
                fileOutputStream.close();
            }}catch (IOException e) {
                e.printStackTrace();
            }
        }
文件正常拷贝

字符输入流 FileReader
相关API

代码示例
String filePath = "d:\\IOTest\\story.txt";
FileReader fileReader = null;
int date = 0;
try {
    fileReader= new FileReader(filePath);
    while((date = fileReader.read())!=-1){
        System.out.print((char)date);
    }
} catch (IOException e) {
    e.printStackTrace();
}finally {
    try {
        fileReader.close();
    } catch (IOException e) {
        e.printStackTrace();
    }
}
字符流就是专门为了处理文本文件,我们可以看到经过FileReader读取的字符,中文字符叶没有出现乱码,注意read方法返回的是字符的ASCII值,FileReader也能指定缓冲区,这里不重复说明
字符输出流FileWriter
相关API

代码示例
 String filePath = "d:\\IOTest\\note.txt";
        FileWriter fileWriter = null;
        char[] chars = {'a', 'b', 'c'};
        try {
            fileWriter = new FileWriter(filePath);
            fileWriter.write('H');
            fileWriter.write("学java狠狠赚一笔");
            fileWriter.write(chars);

        } catch (IOException e) {
            e.printStackTrace();
        } finally {
            try {
//                对于FileWriter,一定要关闭流,或者flush才能真正将数据写入到文件中
                fileWriter.close();
            } catch (IOException e) {
                e.printStackTrace();
            }
        }

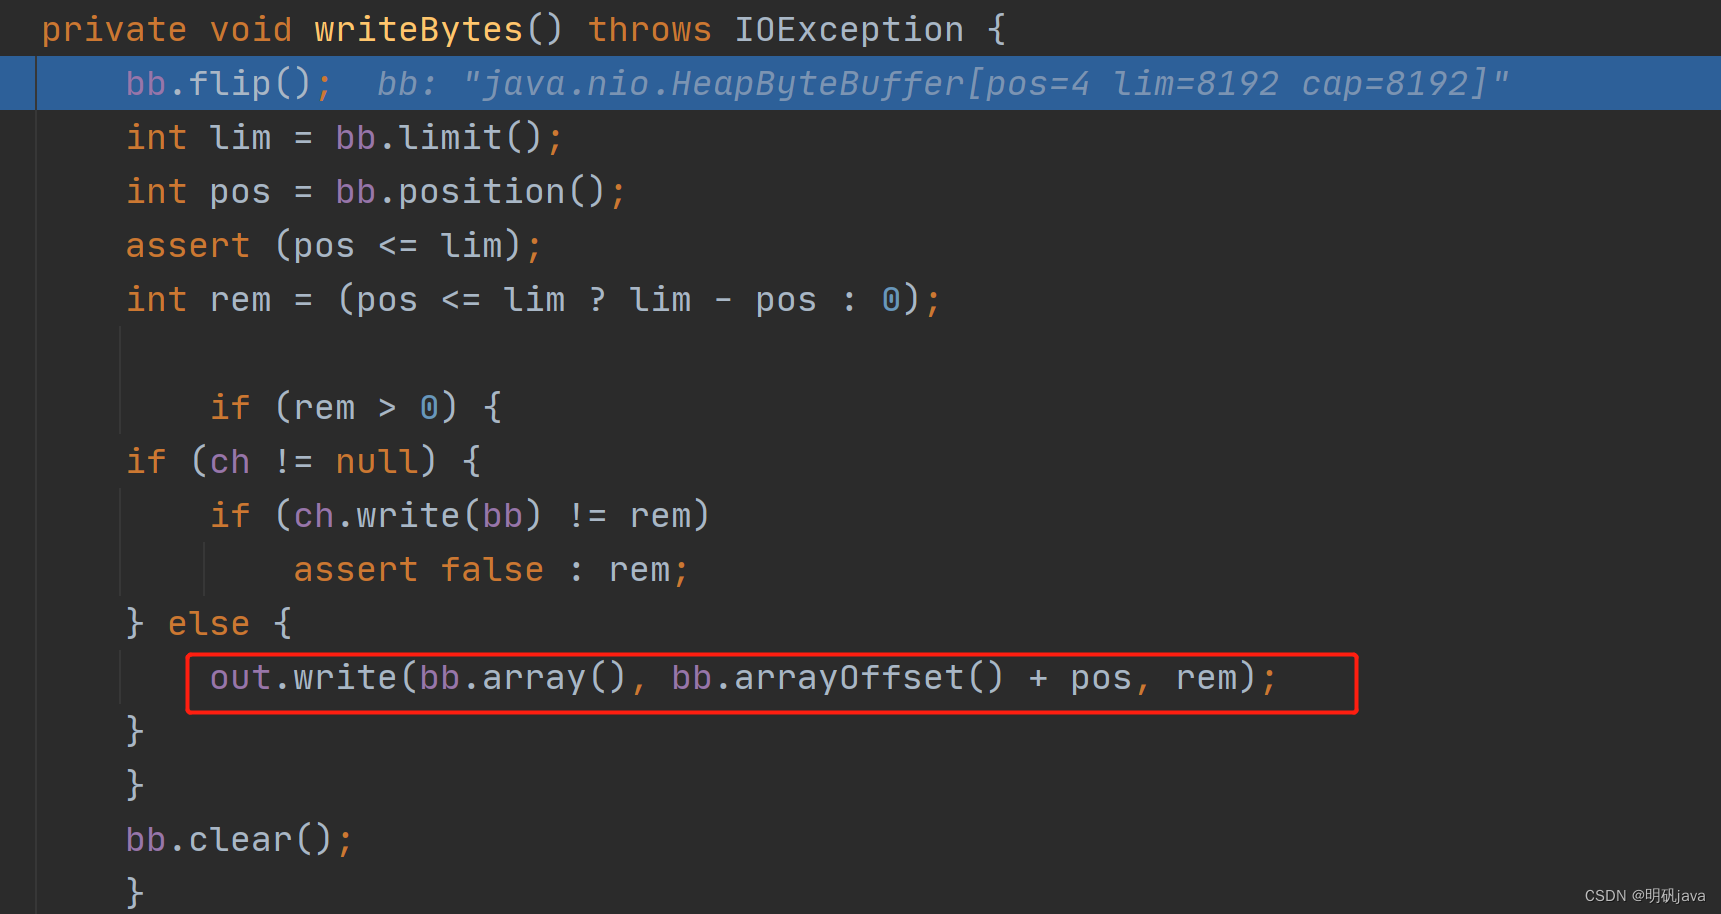
为什么要一定关闭流或者执行flush,才会真正写入数据
原因是在执行close之后,FileWriter才会真正调用底层接口进行数据写入
节点流和处理流
概念
节点流:可以从一个特定的数据源(文件)读写数据,如前面的FileInputStream,FileWriter
处理流:建立在已存在的流的基础上,为程序提供更为强大的读写功能,即利用修饰器设计模式,拓展了原始流的功能,使其更加强大,如BufferedReader,BufferedWriter
处理流原理
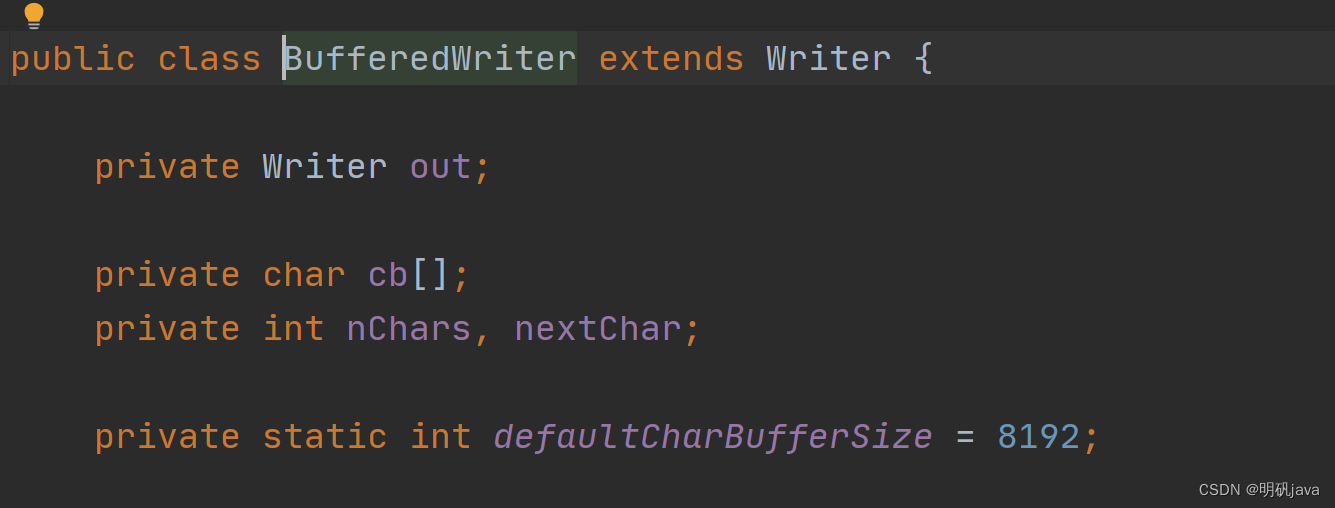
处理流为什么能封装原始的节点流以BufferedWriter为例
FileWriter继承了Writer类,BufferedWriter也继承了Writer类
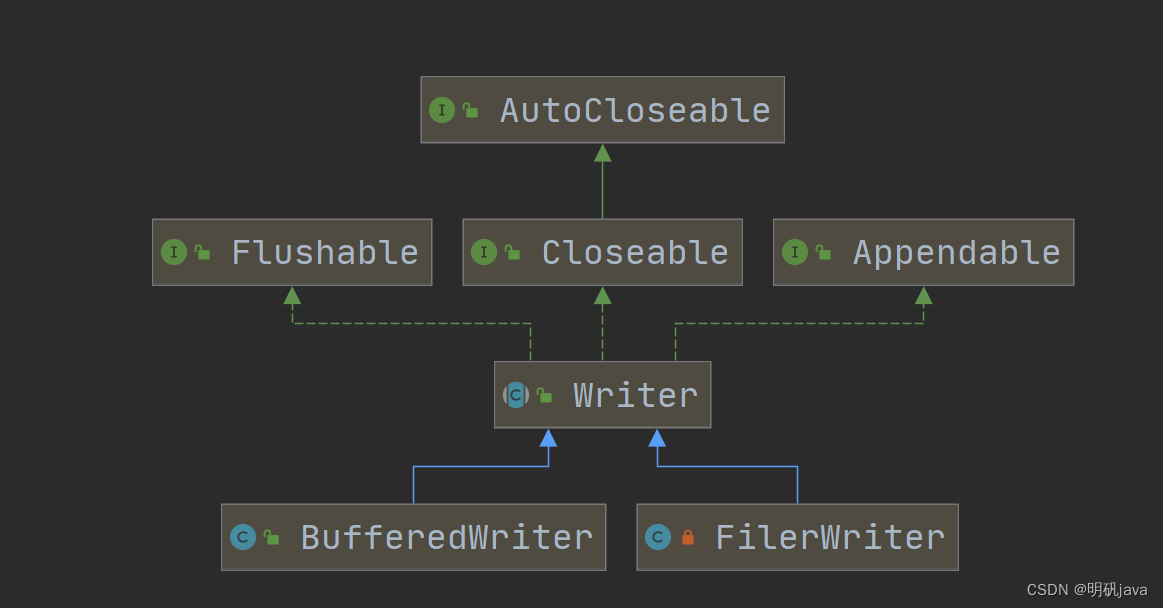
而BufferedWriter的成员属性out的数据类型是Writer可以接收FilerWriter的对象,这正是多态的体现。这说明了,我们可以封装任意一个节点流,只要该节点流对象是Writer的子类即可,BufferedReader同理。
处理流作用
处理流的功能主要体现在以下两个方面:
- 性能的提高:主要以增加缓冲的方式来提高输入输出的效率。
- 操作的便捷:处理流可能提供了一系列便捷的方法来一次输入输出大批量的数据,比如自带缓冲区,提高读取性能,使用更加灵活方便。
BufferedReader
相关API

代码示例
在创建BufferedReader对象时,需要传入相应的节点流对象,关闭外层流即可,调用BufferedReader的close方法底层也会调用节点流的close方法进行流的关闭
String filePath = "d:\\IOTest\\note.txt";
BufferedReader bufferedReader = new BufferedReader(new FileReader(filePath));
String line = "";
//按行读取效率高,返回null时表示读取完成
while((line=bufferedReader.readLine())!=null){
    System.out.println(line);
}
//关闭外层流即可
bufferedReader.close();
BufferedWriter
相关API

代码示例
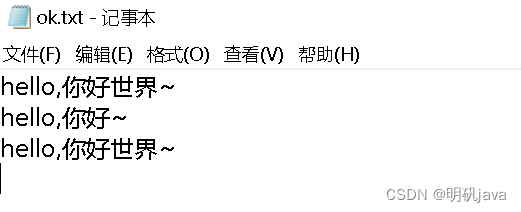
String filePath = "d:\\IOTest\\ok.txt";
BufferedWriter bufferedWriter = new BufferedWriter(new FileWriter(filePath,true));
bufferedWriter.write("hello,你好世界~");
bufferedWriter.newLine();//系统换行
bufferedWriter.write("hello,你好~");
bufferedWriter.newLine();
bufferedWriter.write("hello,你好世界~");
bufferedWriter.newLine();
bufferedWriter.close();
BufferedOutputStream与BufferedInputStream
BufferedInputStream:字节流,在创建BufferedInputStream时会自动创建一个缓冲区数组也就是不用我们手动创建缓冲区
BufferedOutputStream:字节流,实现缓冲的输出流,可以将多个字节写入底层输出流中,而不必对每次字节写入调用底层系统
对象处理流
用途
当我们在保存数据的时候需要保存其类型,又要在文件中恢复对象或者该数据类型时,即要能够将基本数据类型或者对象进行序列化和反序列化操作,此时要用对象处理流进行数据操作
序列化和反序列化
序列化:序列化就是在保存数据时,保存数据的值和数据类型
反序列化:反序列化就是在恢复数据时,恢复数据的值和数据类型
实现序列化的条件
类要实现序列化,要实现Serializable接口,java的基本数据类型的包装类都实现了Serializable接口。
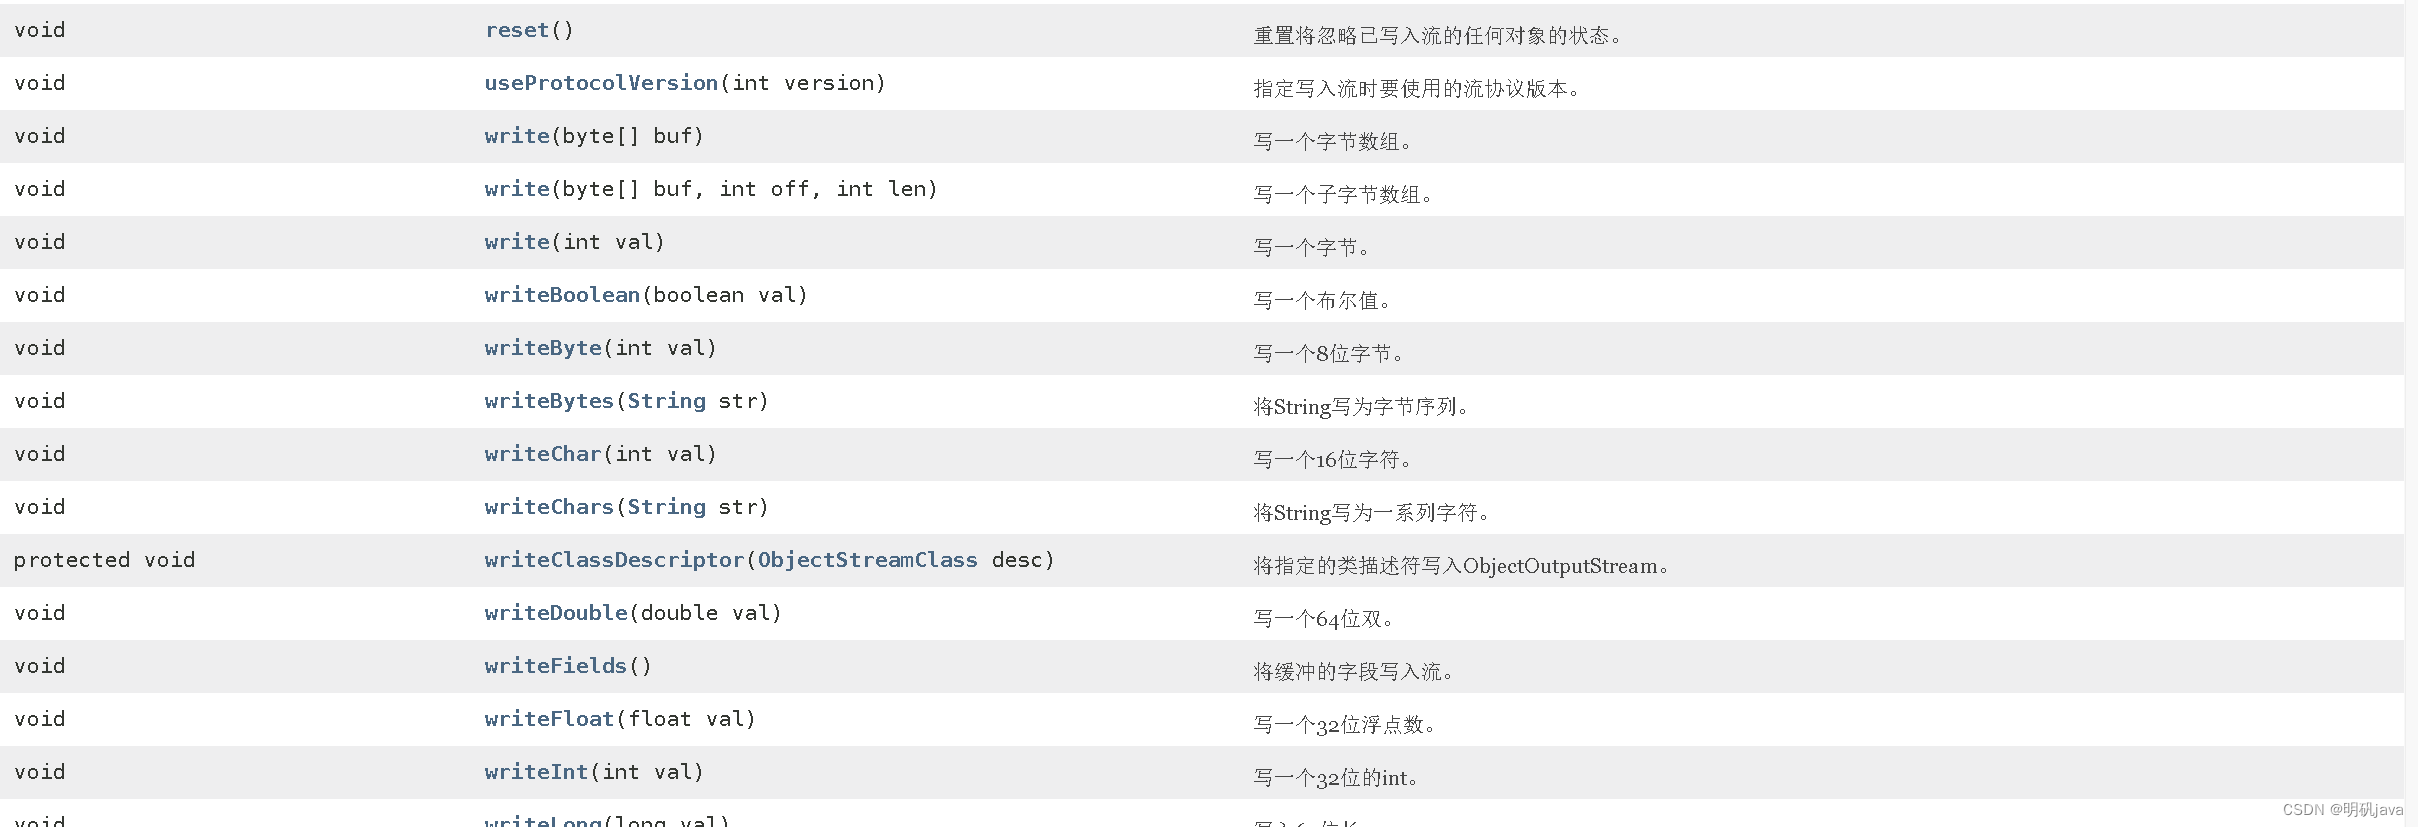
ObjectOutputStream
相关API
提供了一系列api,方便我们输出基本数据类型和自定义类
代码示例
 public static void main(String[] args) throws Exception{
        String filePath = "d:\\IOTest\\data.dat";
        ObjectOutputStream oos =
                new ObjectOutputStream(new FileOutputStream(filePath));
        oos.writeInt(100);
        oos.writeBoolean(true);
        oos.writeChar('a');
        oos.writeDouble(9.5);
        oos.writeUTF("jack");
        oos.writeObject(new Dog("旺财",10));
        oos.close();
        System.out.println("数据保存完毕(序列化形式)");
    }

}
class Dog implements Serializable {
    private String name;
    private int age;

    public Dog(String name, int age) {
        this.name = name;
        this.age = age;
    }

    @Override
    public String toString() {
        return "Dog{" +
                "name='" + name + '\'' +
                ", age=" + age +
                '}';
    }
}
由于是字节流,未转化编码故为乱码,但我们仍可以看到类型为Dog

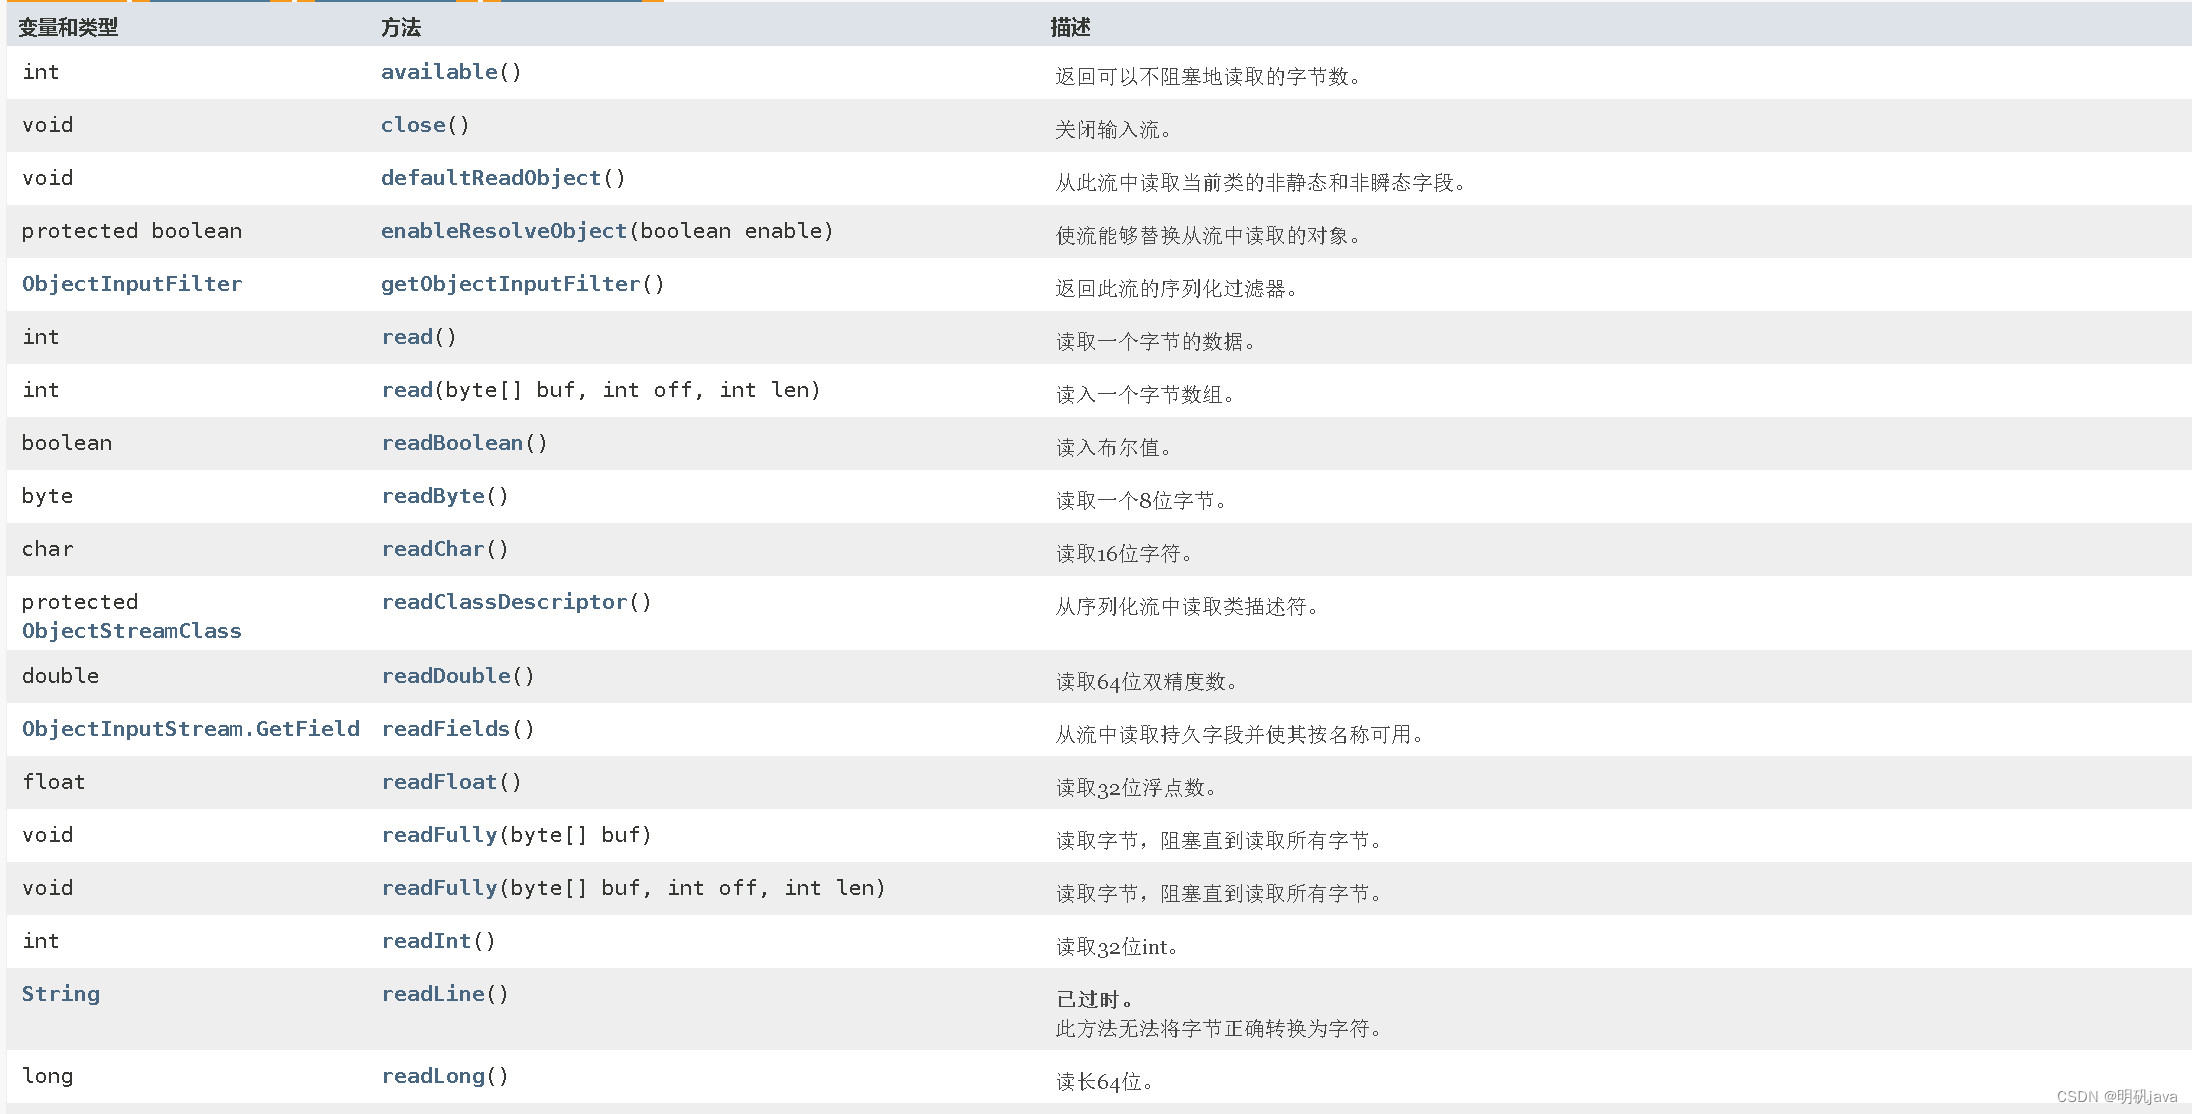
ObjectInputStream
相关API
代码示例
String filePath = "d:\\IOTest\\data.dat";
ObjectInputStream ois = new ObjectInputStream(new FileInputStream(filePath));
System.out.println(ois.readInt());
System.out.println(ois.readBoolean());
System.out.println(ois.readChar());
System.out.println(ois.readDouble());
System.out.println(ois.readUTF());
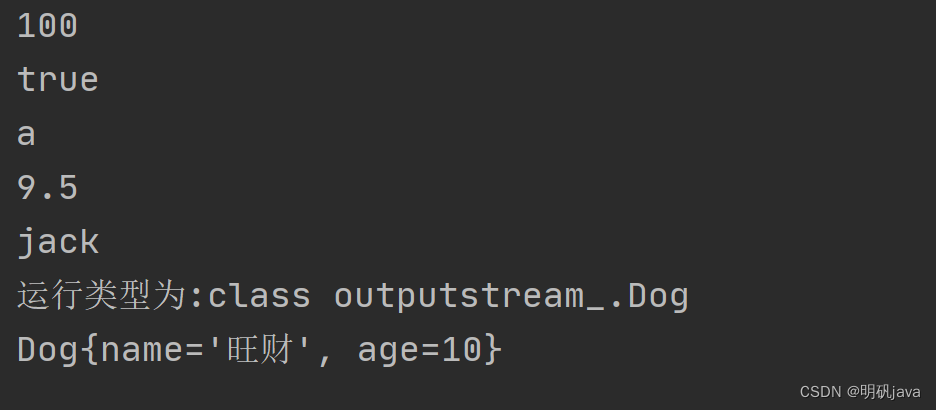
Object dog = ois.readObject();
System.out.println("运行类型为:"+dog.getClass());
System.out.println(dog);
ois.close();
System.out.println();
转化流
必要性
当我们通过FileInputStream读取文件时,读到中文时,会出现乱码,如图中的狠狠赚一笔就变成乱码,所以需要转化流来指定编码格式

InputStreamReader
InputStreamReader作为Reader的子类,可以将InputStream(字节流)包装成(转换)Reader(字符流)
构造方法和API
最大的特点即是我们可以指定流的编码格式

代码示例
String filePath = "d:\\IOTest\\note.txt";
//创建输入转化流InputStreamReader对象,同时指定编码为utf-8
InputStreamReader inputStreamReader = new InputStreamReader(new FileInputStream(filePath), "utf-8");
//包装成BufferedReader对象进行字符读取操作
BufferedReader bufferedReader = new BufferedReader(inputStreamReader);
String s = bufferedReader.readLine();
System.out.println("读取内容="+s);
bufferedReader.close();
我们又可以看到狠狠赚一笔了

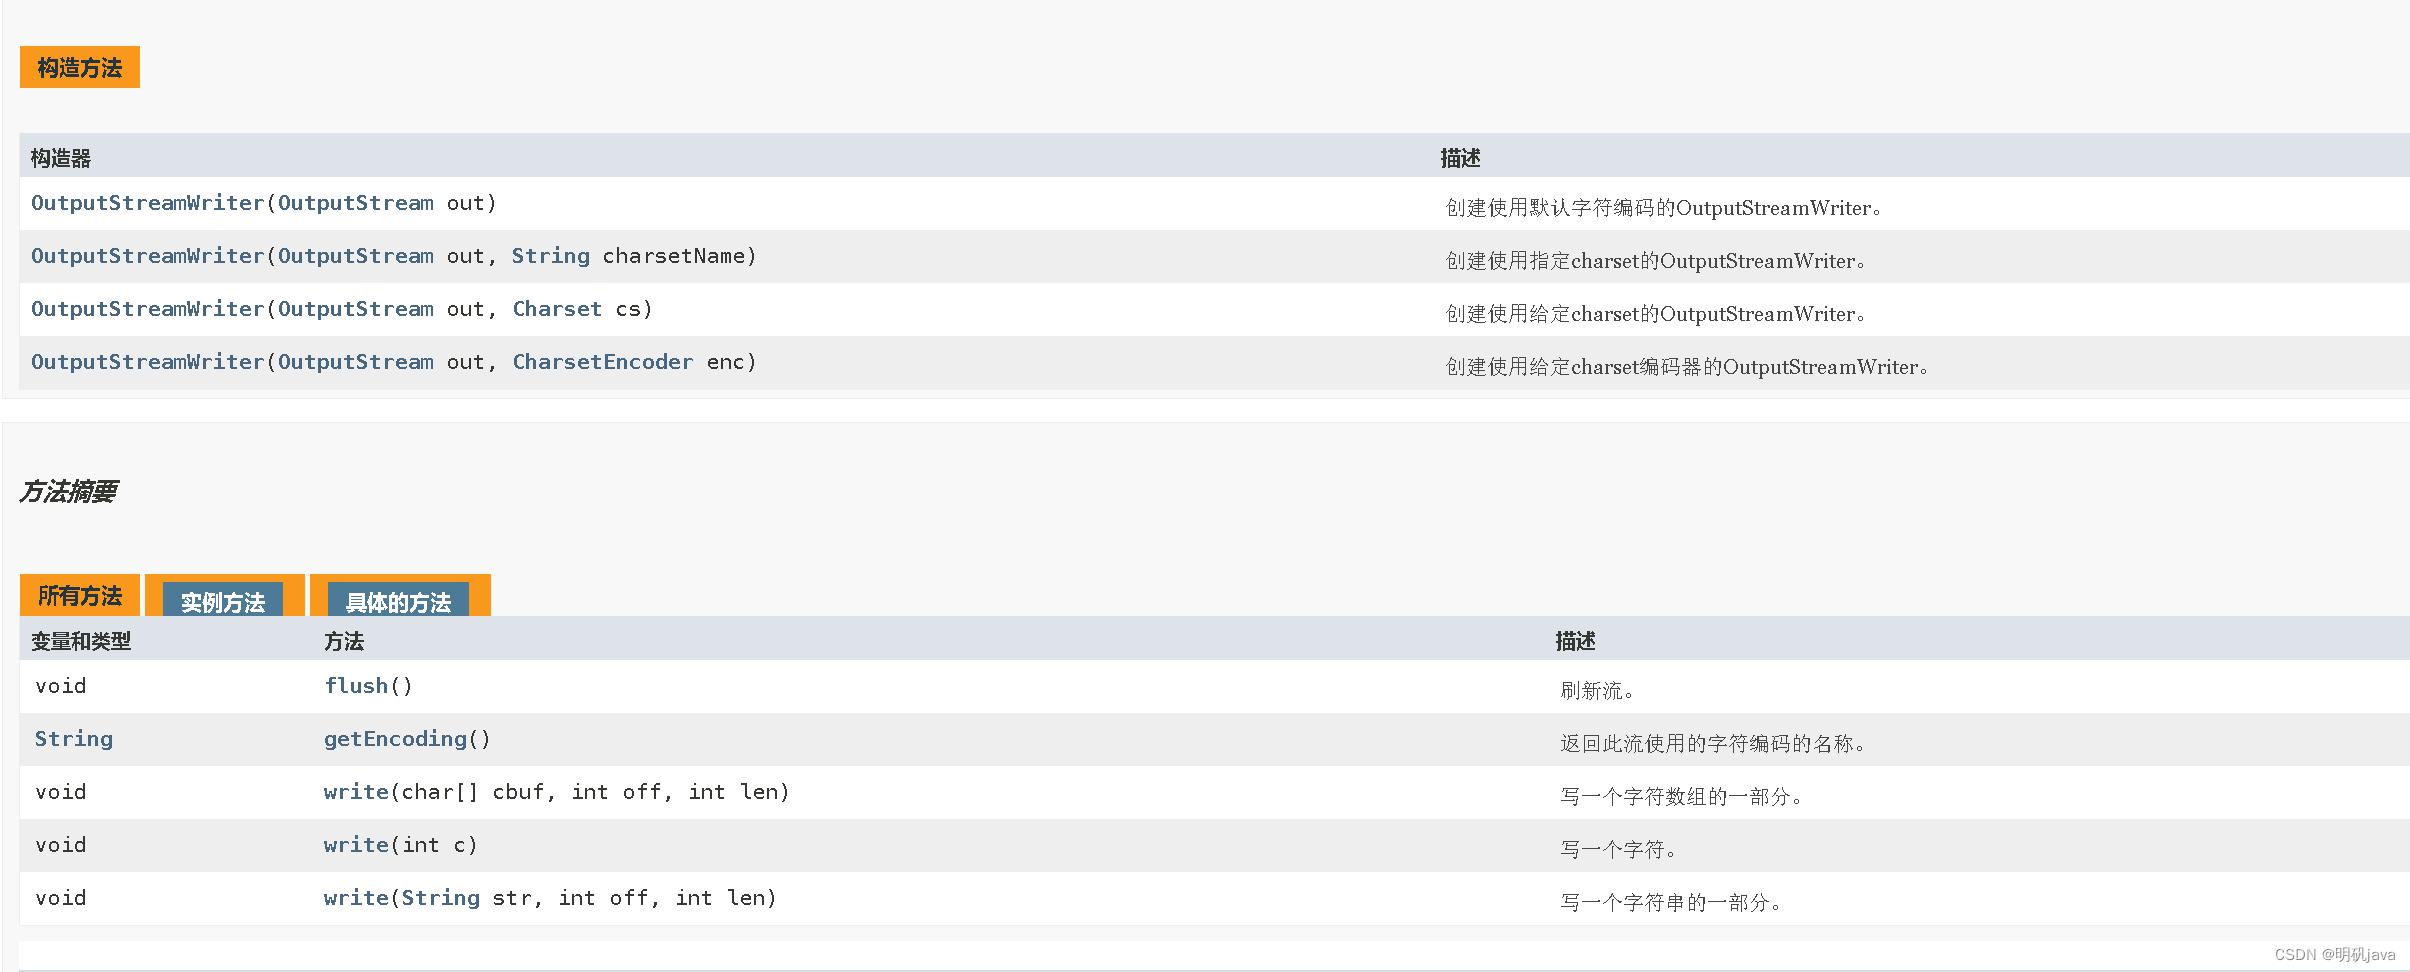
OutputStreamWriter
OutputStreamWriter:Writer的子类,实现将OutputStream(字节流包装成Writer
构造方法和相关API
代码示例
String filePath = "d:\\IOTest\\hello.txt";
//指定编码
String charSet="utf8";
//包装流
OutputStreamWriter outputStreamWriter =
        new OutputStreamWriter(new FileOutputStream(filePath), charSet);
outputStreamWriter.write("hello world 你好世界");
outputStreamWriter.close();
System.out.println("按照 "+charSet+" 保存文件成功~");

打印流
PrintStream与PrintWriter
相关API
PrintStream默认打印内容到显示器上,但我们可以通过构造器指定输出的位置,比如将内容输出到文件中

代码示例
PrintStream out = System.out;
out.print("john,hello");
out.write(" 你好".getBytes());
out.close();
//修改输出位置
System.setOut(new PrintStream("d:\\f1.txt"));
System.out.println("hello,你好世界");
本文来自互联网用户投稿,该文观点仅代表作者本人,不代表本站立场。本站仅提供信息存储空间服务,不拥有所有权,不承担相关法律责任。如若内容造成侵权/违法违规/事实不符,请联系邮箱:jacktools123@163.com进行投诉反馈,一经查实,立即删除!
标签:

